Operation Manual of Vending Machine Control System
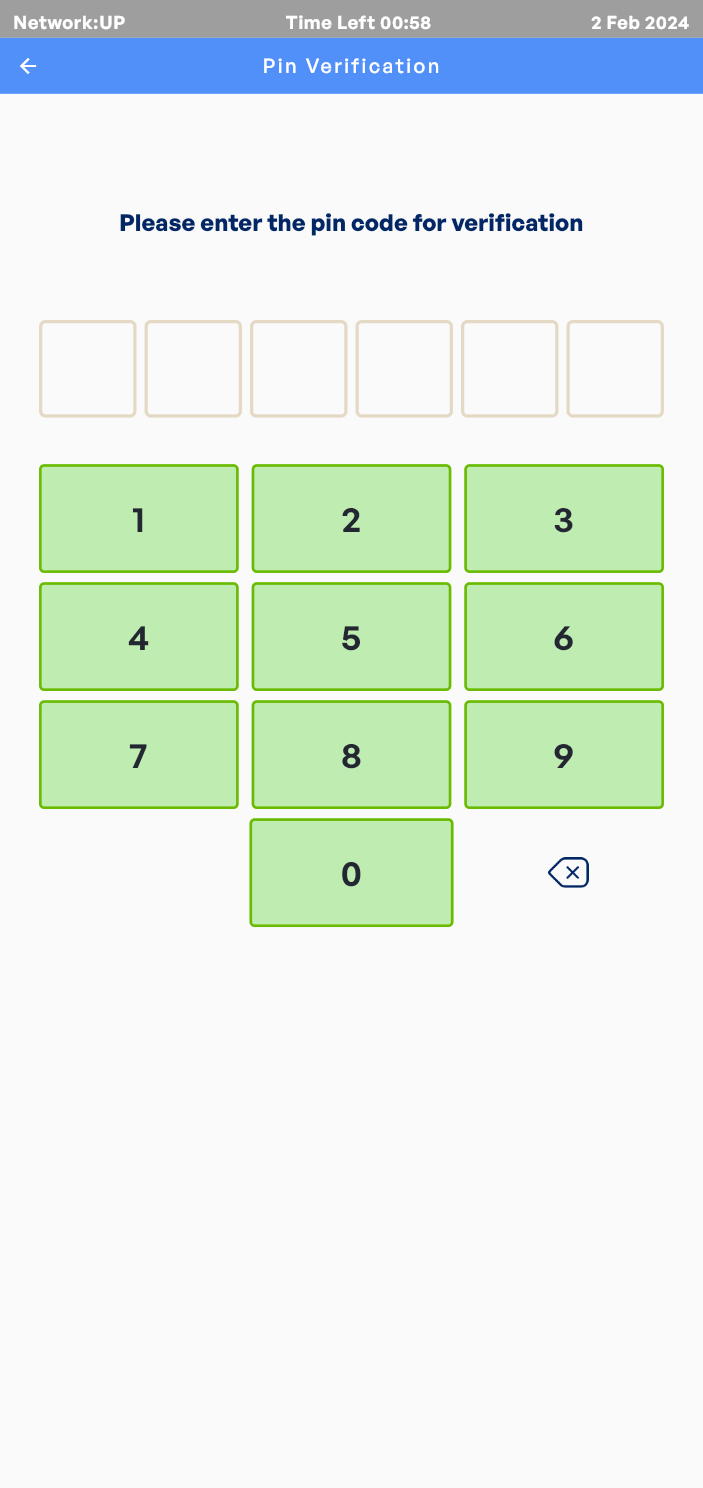
Certain functions can be executed locally on the vending machine’s control system without requiring backend system involvement. Authorized personnel can access an administrative interface on the machine’s interactive touchscreen by inputting certain pin code via the user interface. The hybrid local-remote functionality model aims to optimize operational flexibility while maintaining appropriate security and connectivity.
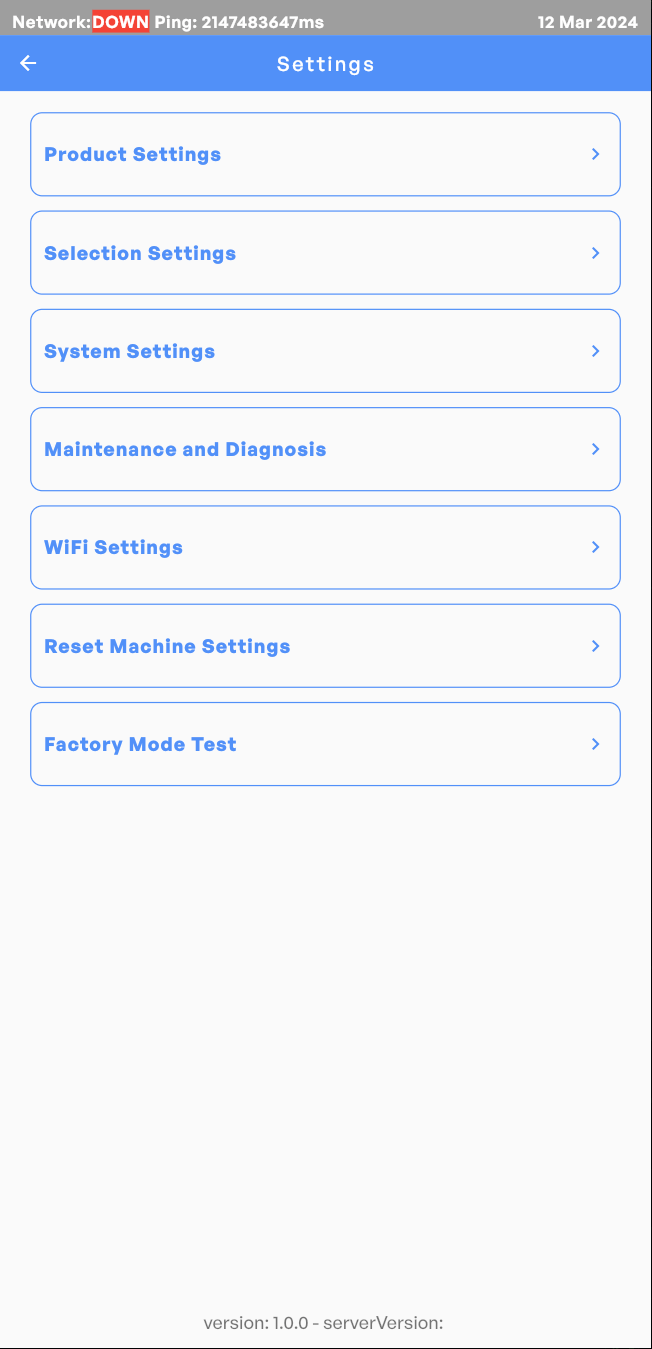
Settings on Vending Machines
Enter the Admin Interface
Authorized personnel can gain access to the administration console through the vending machine’s primary user interface. Specifically, entering a predefined activation code such as 9999. After approaching the Pin Verification interface, input the assigned pin code for identity verification.
Upon authenticated entry into the administrative interface, multiple settings can be completed, such as product settings, selection settings, system settings, maintenance and diagnose, WiFi settings and Reset Vending Machine Settings.
System Settings
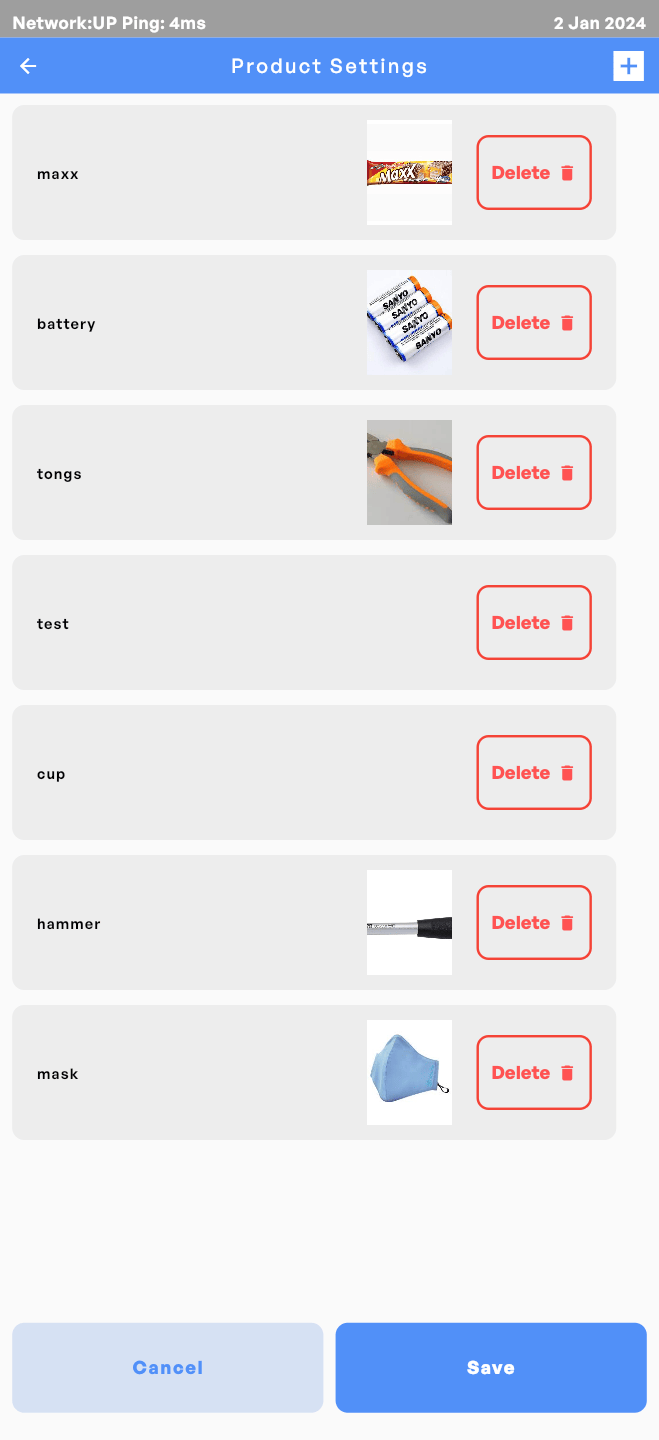
Product Settings
Upon navigating to the product settings sub-section, a complete list of currently stocked items inside the machine is displayed. Relevant data such as product names and pictures are shown for each listing.
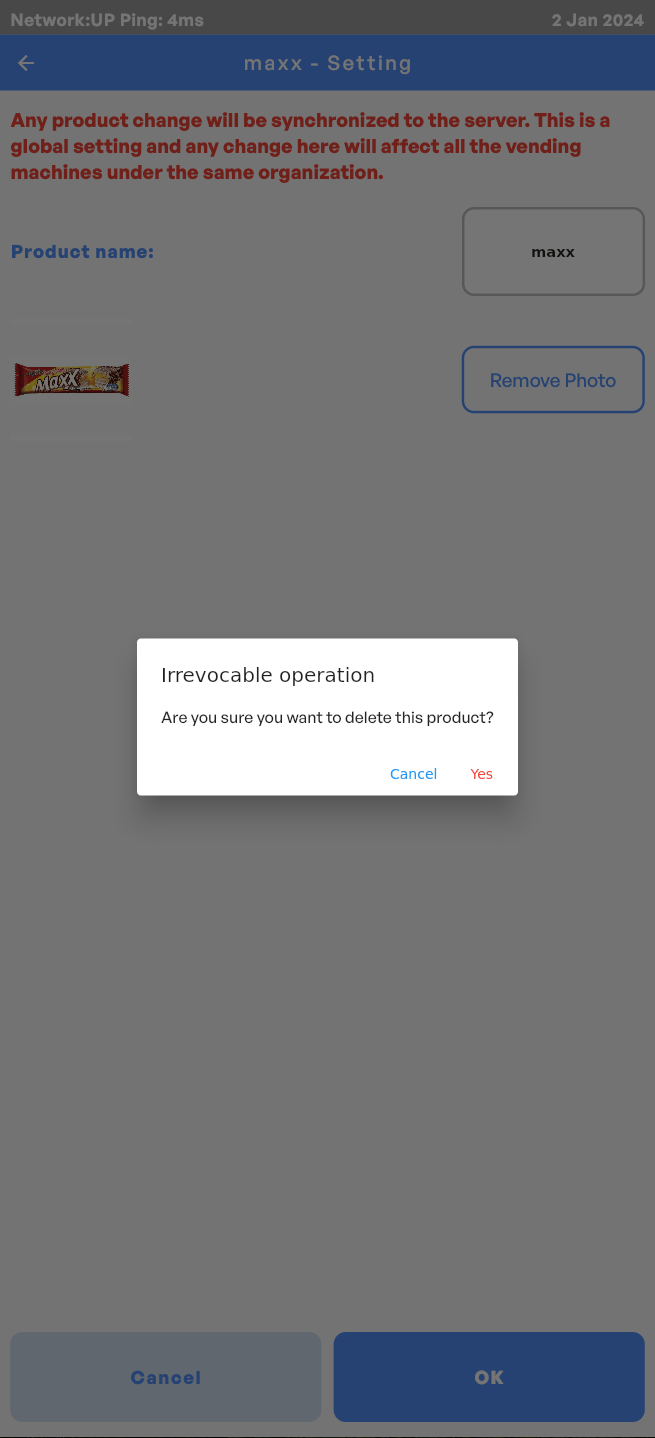
The operator is empowered to remove individual products by clicking the Delete key on the right side of the lists.
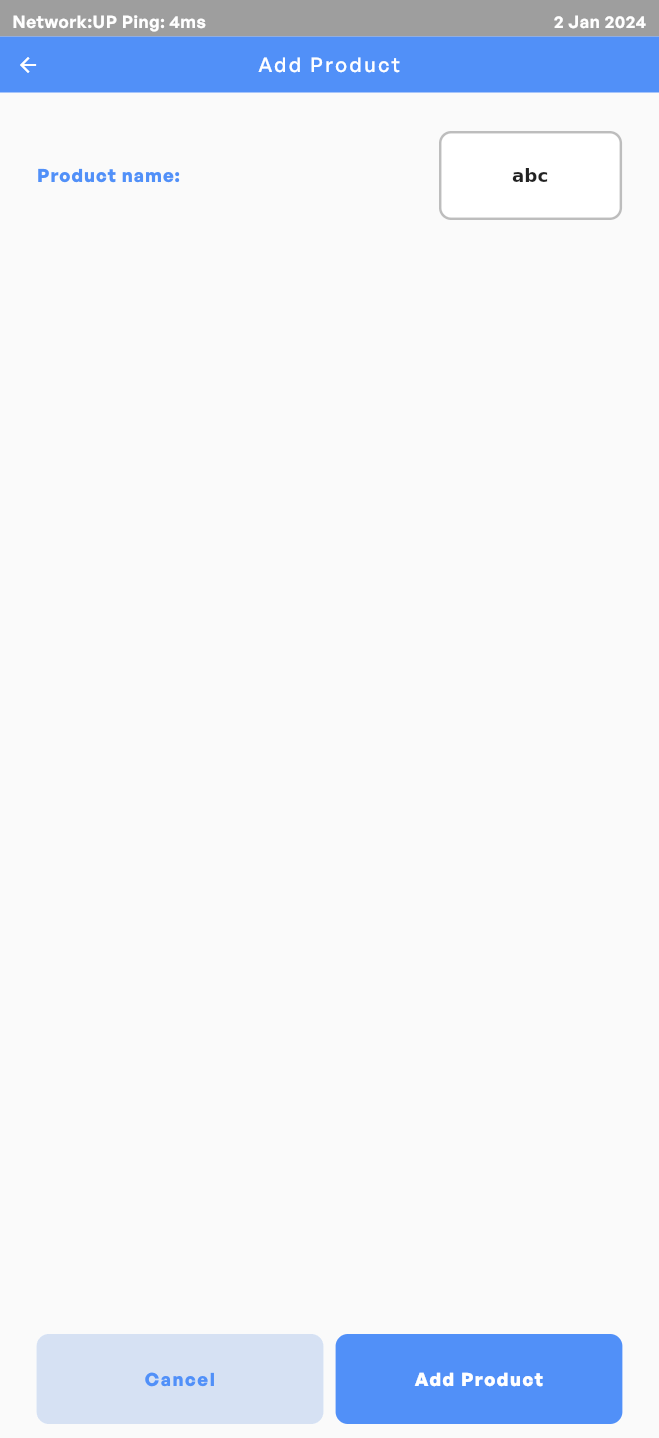
New products can be added through engagement of the + key located in the top right corner of the menu, requiring input of a product name. Updates to relevant product pictures should be performed via the backend telemetry system. Click Add Product to save.
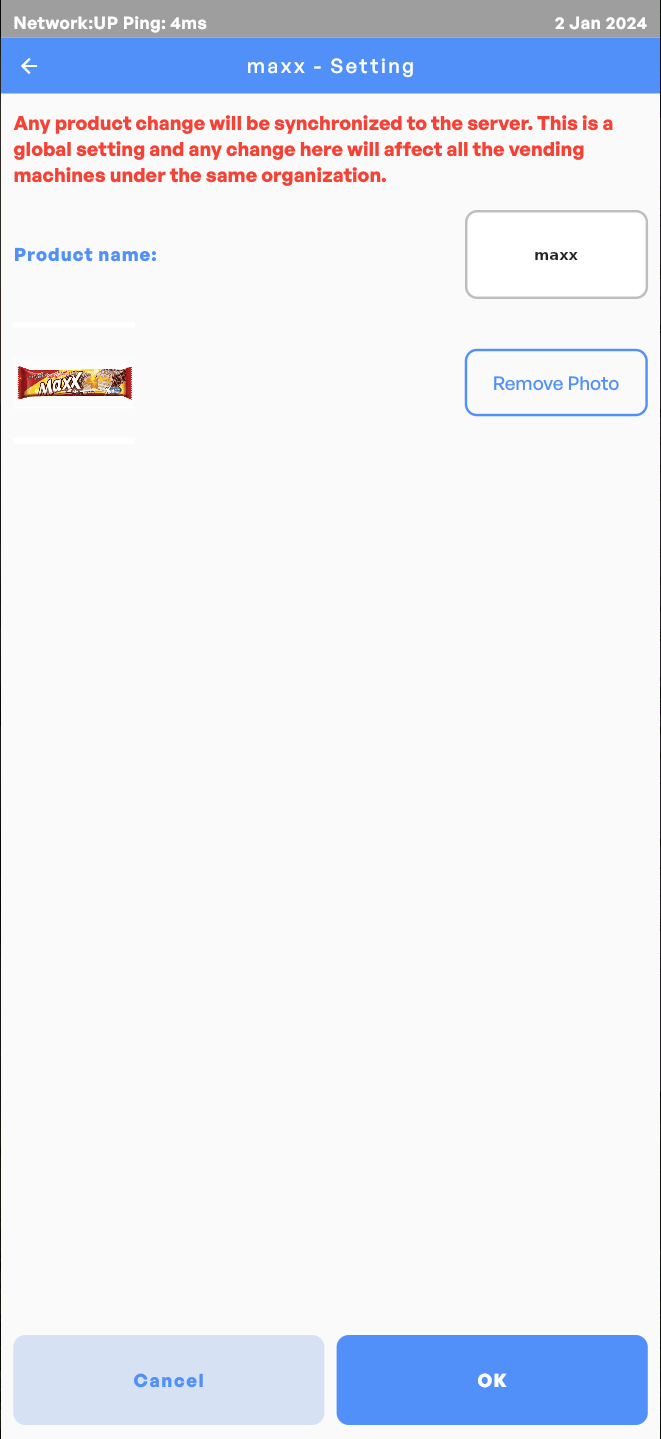
Selecting a specific listing allows separate modification of product name or removal of product photo.
Note: Any product change will be synchronized to the server. This is a global setting and any change here will affect all the vending machines under the same organization.
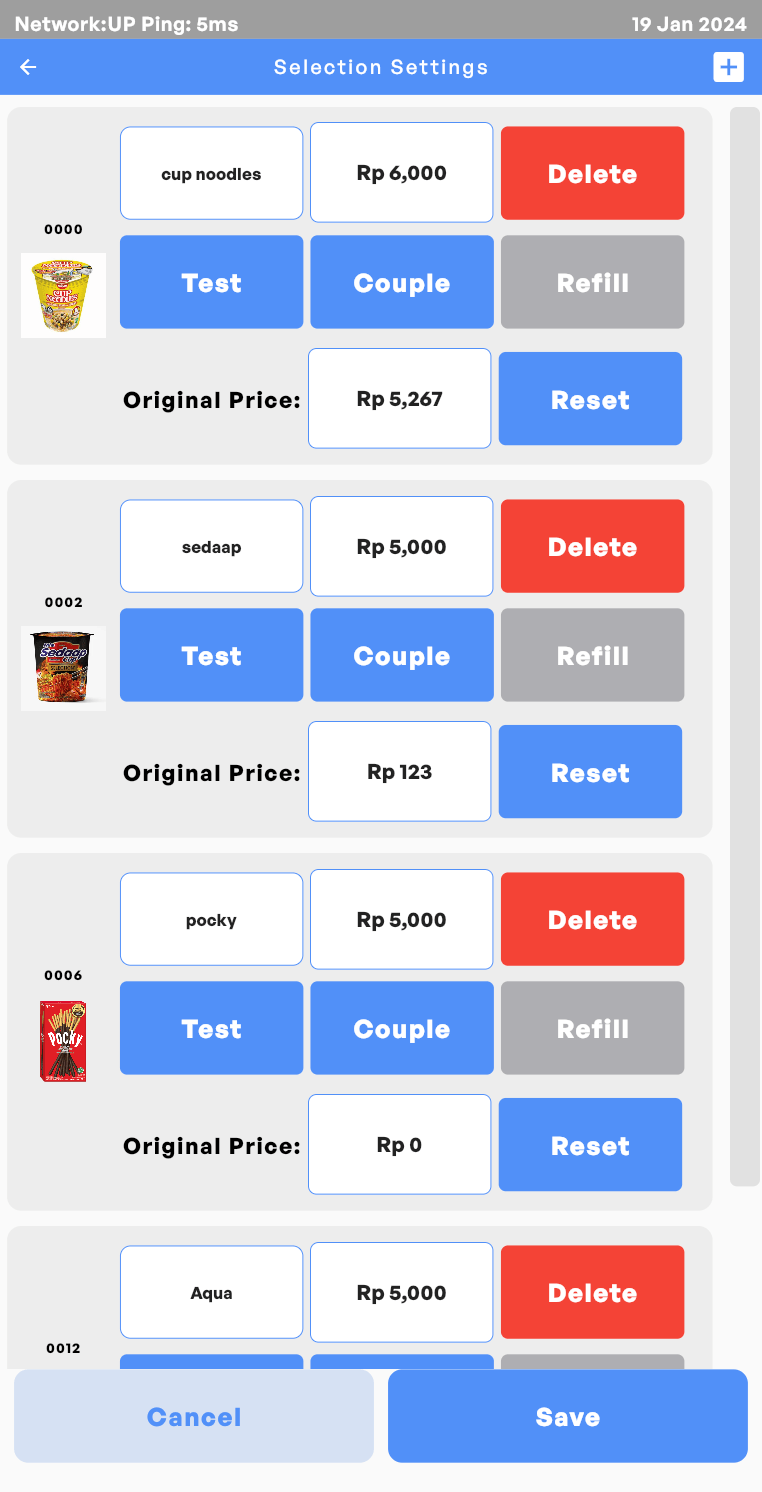
Selection Settings
The Selection Settings module enables personnel to test dispensing, manage product mappings and couple/decouple motors.
Products can be reallocated to a specific selection code.
Both discounted and original prices for each selection can be modified easily in this section. To cancel the discount, simply click the Reset button, which will restore the original price to 0.
Underperforming selections can be removed from the system by clicking the Delete button on the right side of the listing.
Each Test has controls to simulate the dispensing process for validation or troubleshooting.
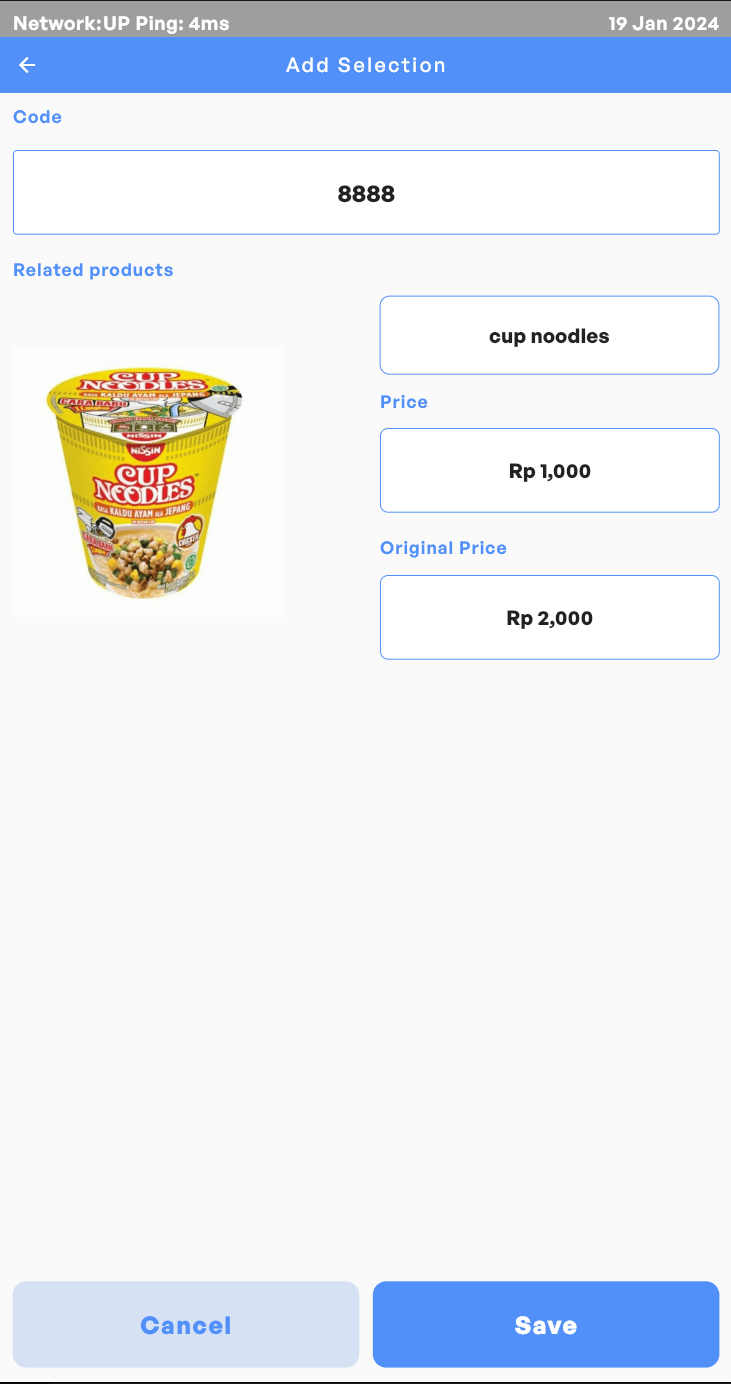
New selections can be created by clicking the + button in the top right corner and providing a unique selection code along with choosing the related products to include and setting up the price.
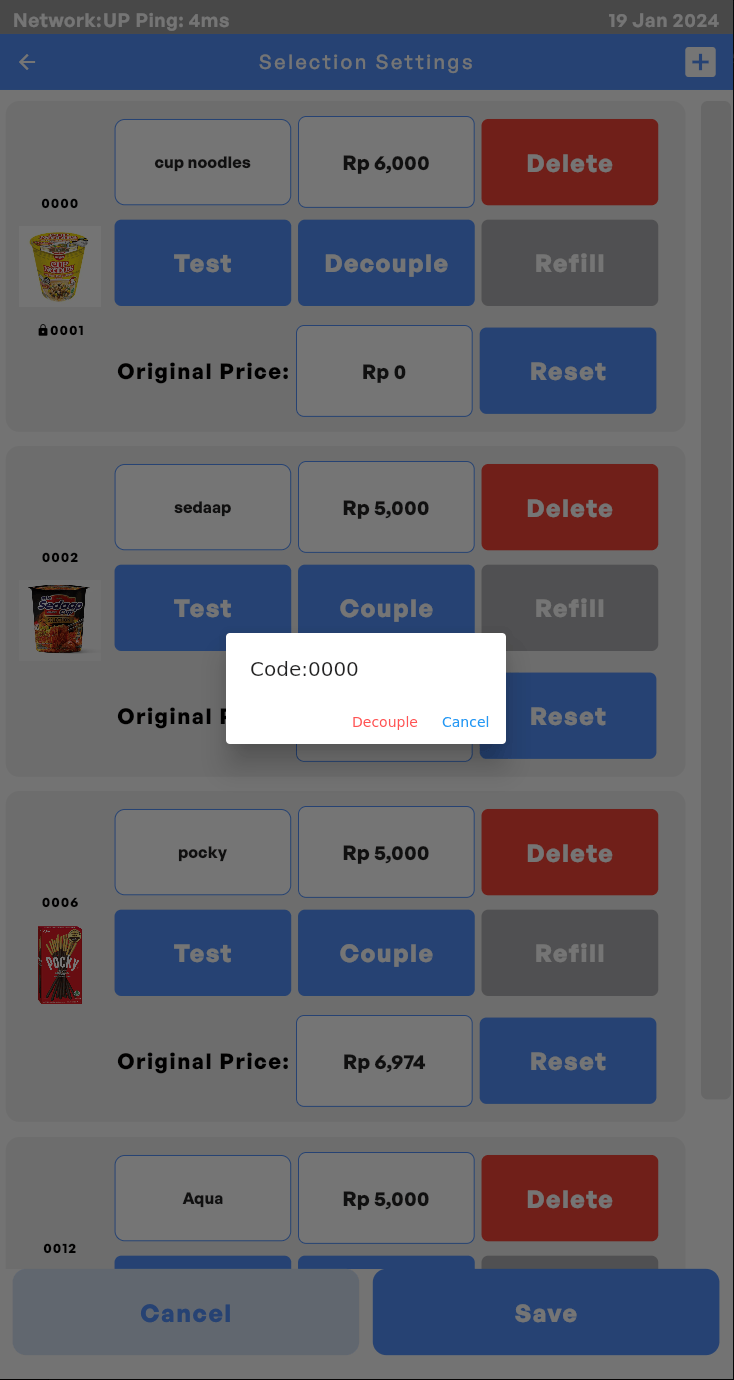
Motor Coupling
KioskForce vending machines have innovatively introduced a new feature - motor coupling, which allows operators to manually couple two seperated motors to make them operate in sync.
To couple motors, click on the Couple button and enter the motor number you want to link. To cancel the coupling, click on the Decouple button.
However, pay attention that there are several configuration rules to follow when coupling the motors:
- The couple code entered must be in the correct format. Normally, the motor code should consist of four digits which represent the machine, the y and x positions respectively.
- The couple code should not be the same as the pin code for entering the admin interface like 9999.
- Cross-tray coupling is not allowed. Motors on separate shelves or levels cannot be coupled. In other words, the first three digits of the motor code should be the same.
- Avoid coupling motors that have already been assigned to an item selection. Any motor that has been assigned to an item selection cannot be coupled.
Vending Machine System Settings
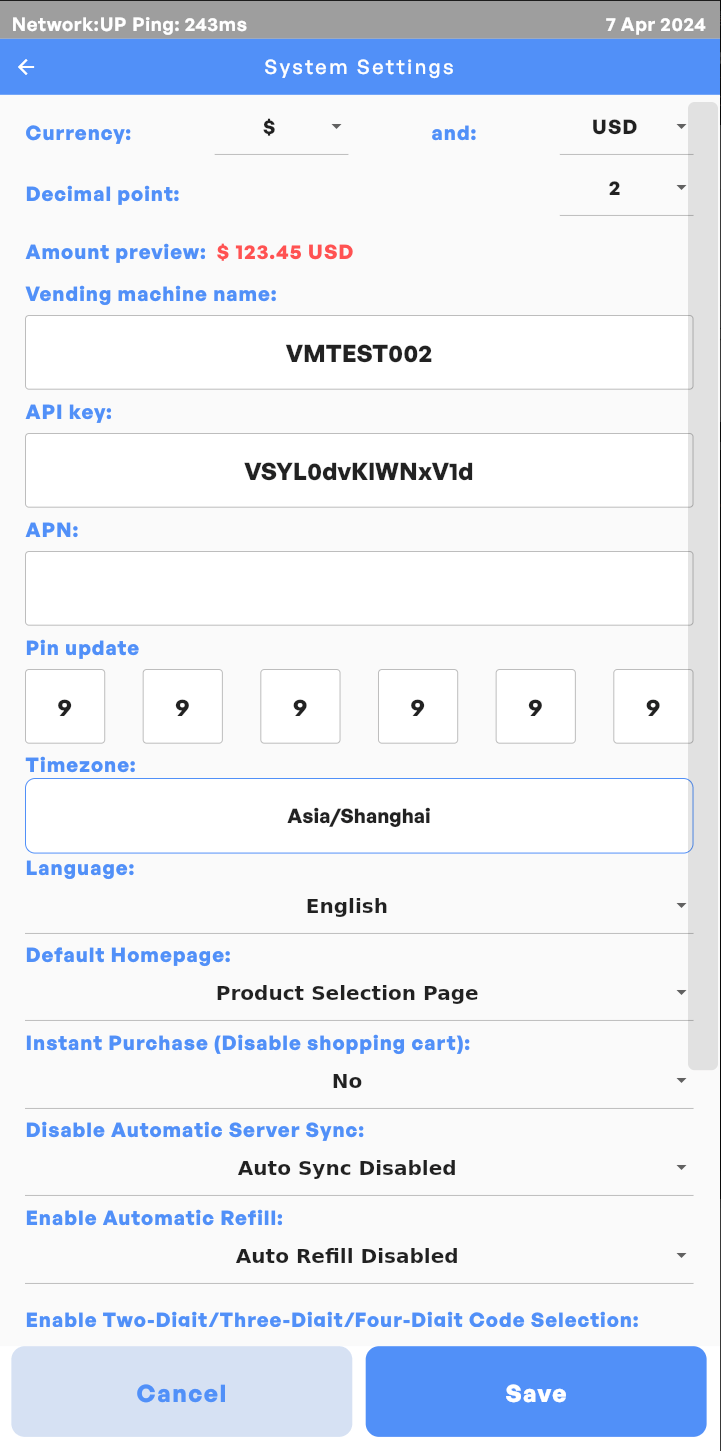
Currency
The currency symbol and name can be set here for appropriate financial display and reporting.
Decimal point
Decimal points can be configured here, with an example shown below as “Amount preview”.
Vending machine name
A unique machine name should be manually entered for clear tracking, monitoring and maintenance of each vending machine.
API key
Enter the valid API key to connect the machine to the backend telemetry system.
APN
Enter the APN code here to realize network communication of the machine.
Pin update
Administrative pin code can be modified here securely for access to the machine control system.
Timezone
Multiple time zones are provided to select according to the geographic location where the machine is located.
Language
Selectable languages accommodate diverse operator teams and customer bases globally.
Default Homepage
Set the default homepage to either the product selection page or the code input page based on requirements.
Instant Purchase (Disable Shopping Cart)
When the shopping cart is enabled, the customer will be able to purchase multiple products at one time. However, if the machine is running with the elevator, the shopping cart function should be disabled to make sure the proper functioning of the drop sensor. Once disabled, the machine will be switched to the Instant Purchase mode, whereby the customer will be directed to the payment interface after selecting their desired product.
Disable Automatic Server Sync
By default, KioskForce vending machines are configured to automatically synchronize data with the backend server. This ensures product pricing, inventory levels, and other modification settings remain up-to-date across all devices. However, to increase flexibility and cater to different requirements, we allow the admin to set whether to enable automatic data synchronization. Once disabled, any modifications made will not automatically sync.
Enable Automatic Refill
By default, the Automatic Refill feature is disabled in KioskForce vending machines. Once enabled, the machine will be automatically marked as Refilled as soon as the admin enters the admin portal. This provides convenience and saves time by eliminating the need to manually click the Refill button on the Maintenance and Diagnosis page.
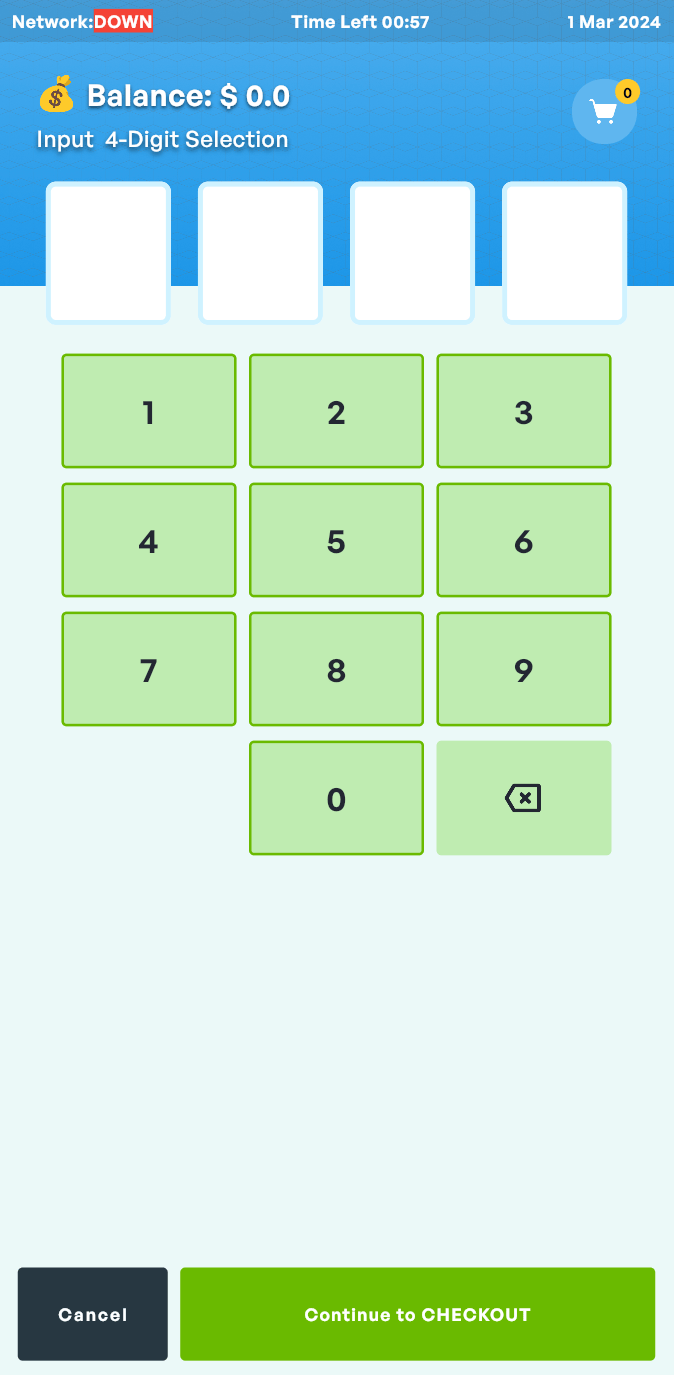
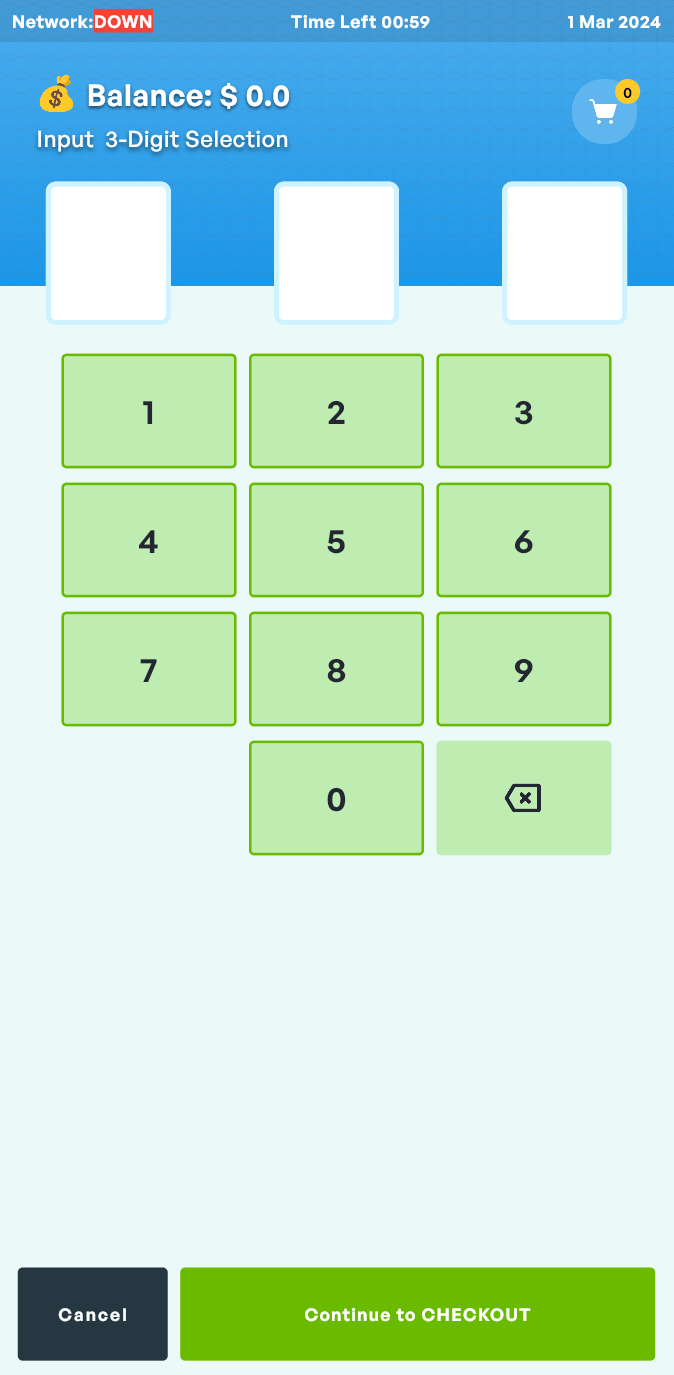
Enable Two-Digit/Three-Digit/Four-Digit Code Selection
To increase user experience, we provide 2-digit or 3-digit express code selection (only applicable to vending machines without slaves).
Typically, when using 4-digit selection code, the first digit represents the machine number. However, if there are no slave machines attached, the first digit can be ignored. The remaining three digits represent the y, x, and x position, respectively. In the case of vending machines that are smaller than 5-wide (10 selections), the second digit can be disregarded. This allows for a simplified code structure and easier selection process.
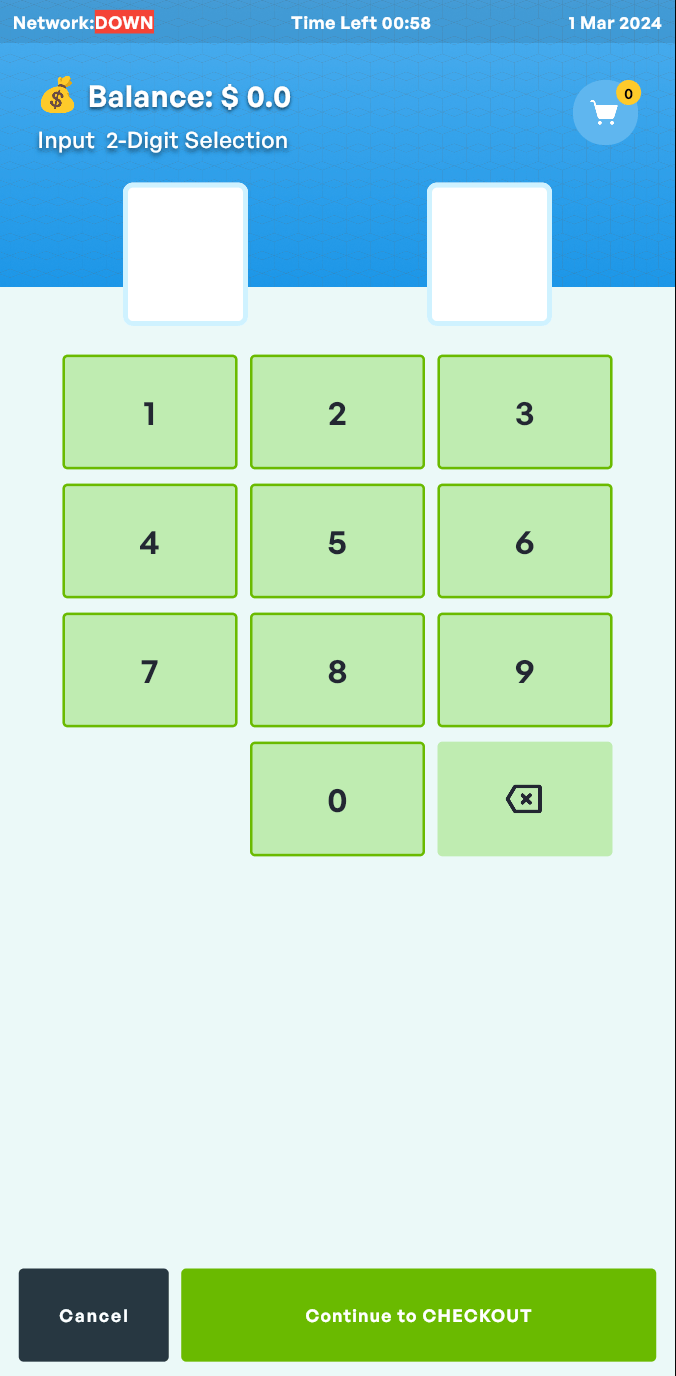
Enable One-Based or Zero-Based Numbering
We allowed express input of x position codes. As for the y position code, you will have the freedom to start it from either one or zero, depending on your preference and specific requirements. For example, under the 2-digit code selection mode, the numbering for the first row and first column can be represented as either 00 or 10.
Slaves Settings
Information of peripheral devices / slaves is shown here, such as IP address, online status, and the last time the slave communicated to the host.
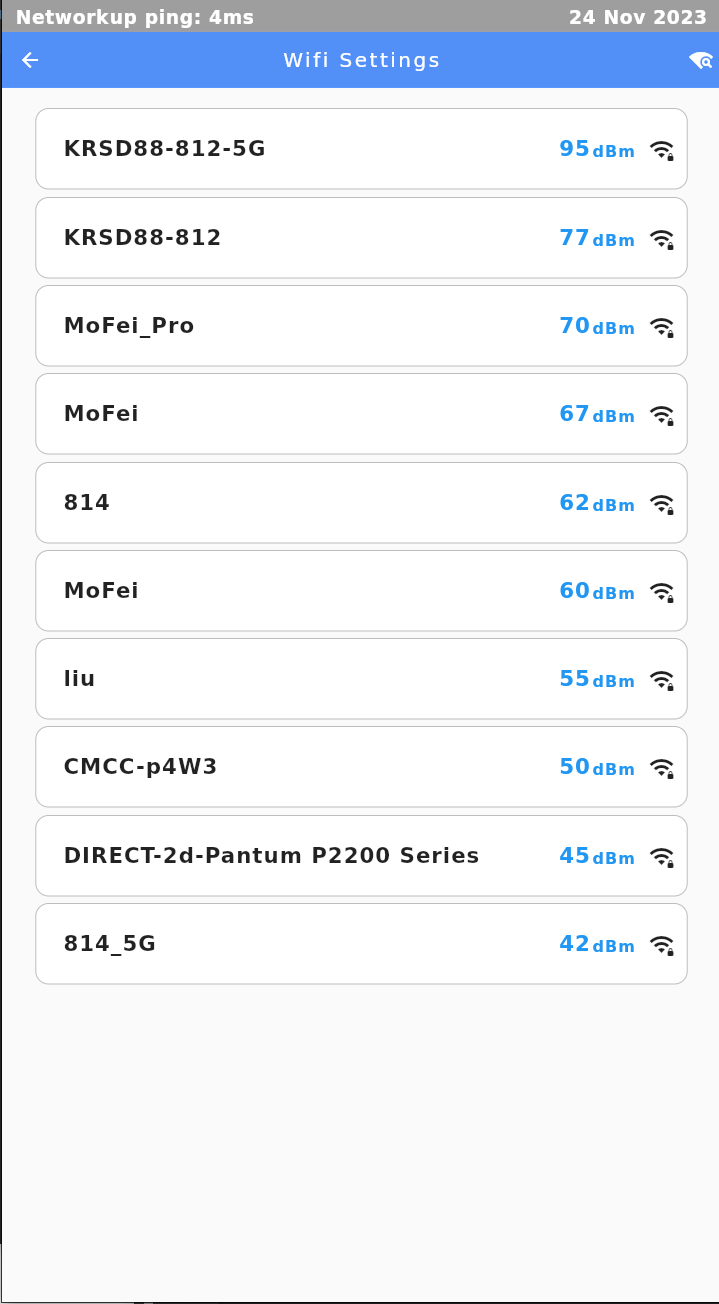
WiFi Settings
Input the correct key to connect the machine to the specific local wireless network.
Maintenance and Diagnosis
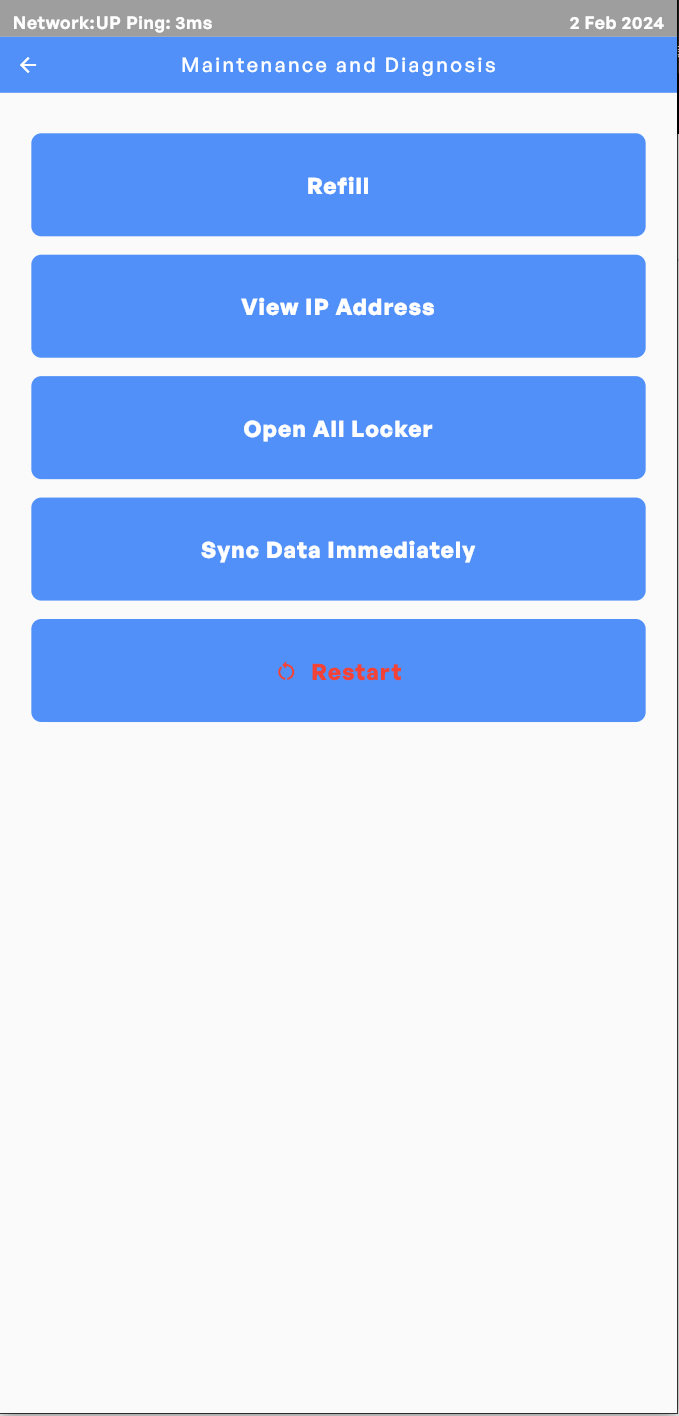
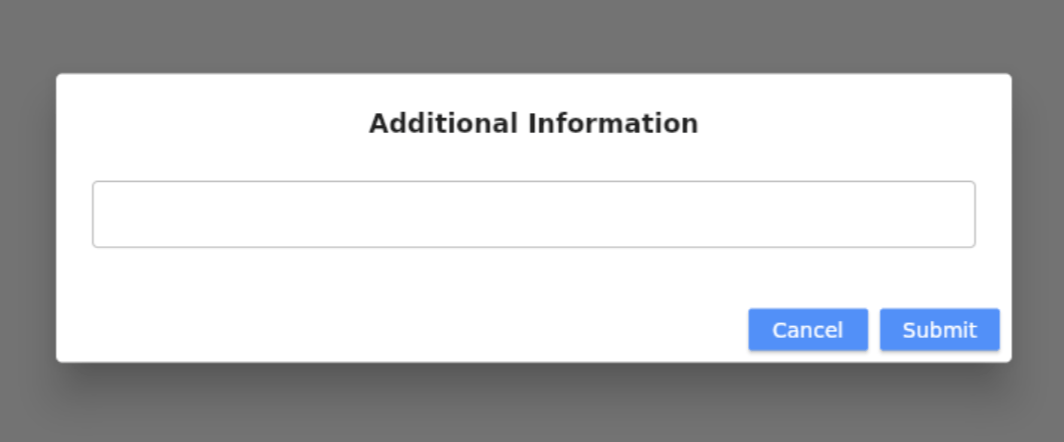
Mark Vending Machine as Refilled
Trays that are out of stock will automatically be disabled to prevent failed vending until inventory is restocked and the Refill key is clicked.
Upon Refill confirmation, optional remarks can be added.
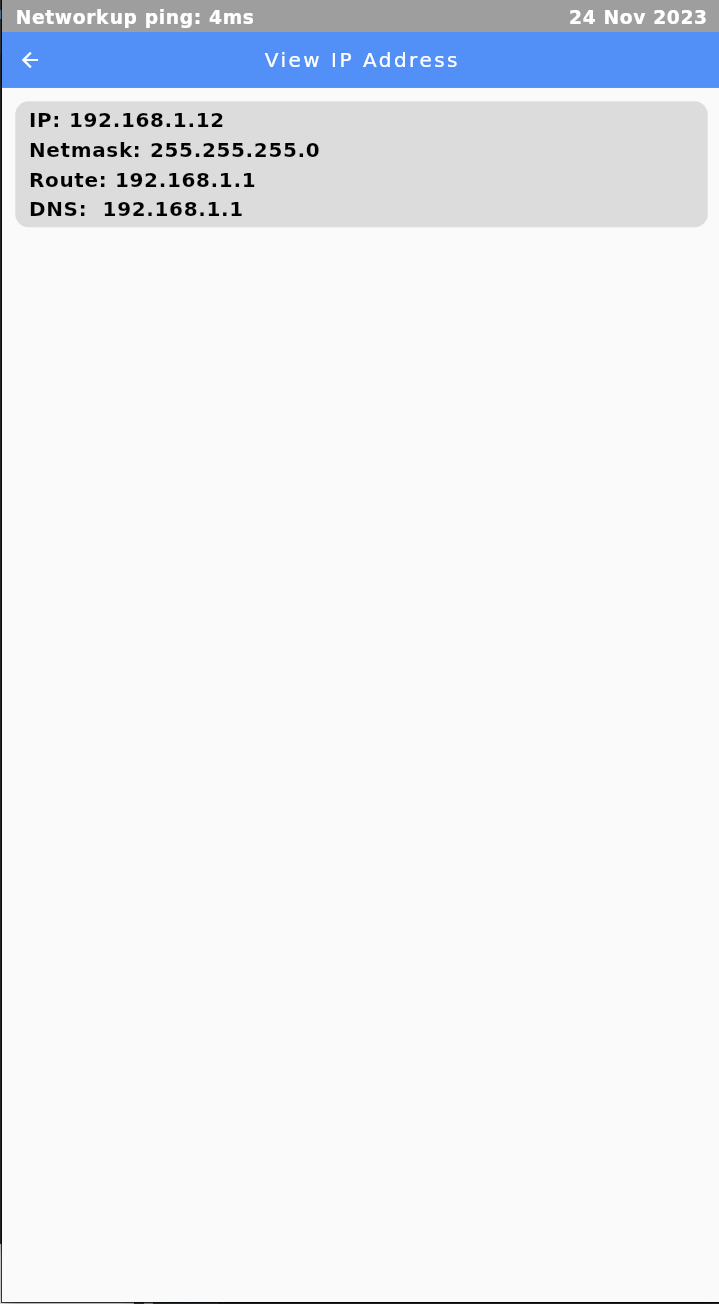
IP Addresses
IP Address can be checked here.
Open All the Lockers
This feature allows the admin to open all the cells of the locker slave with one click on the Open All Locker button. Once clicked, the doors will open one by one.
If the machine is not connected to any locker, the button will be disabled and shown as No Locker Available instead.


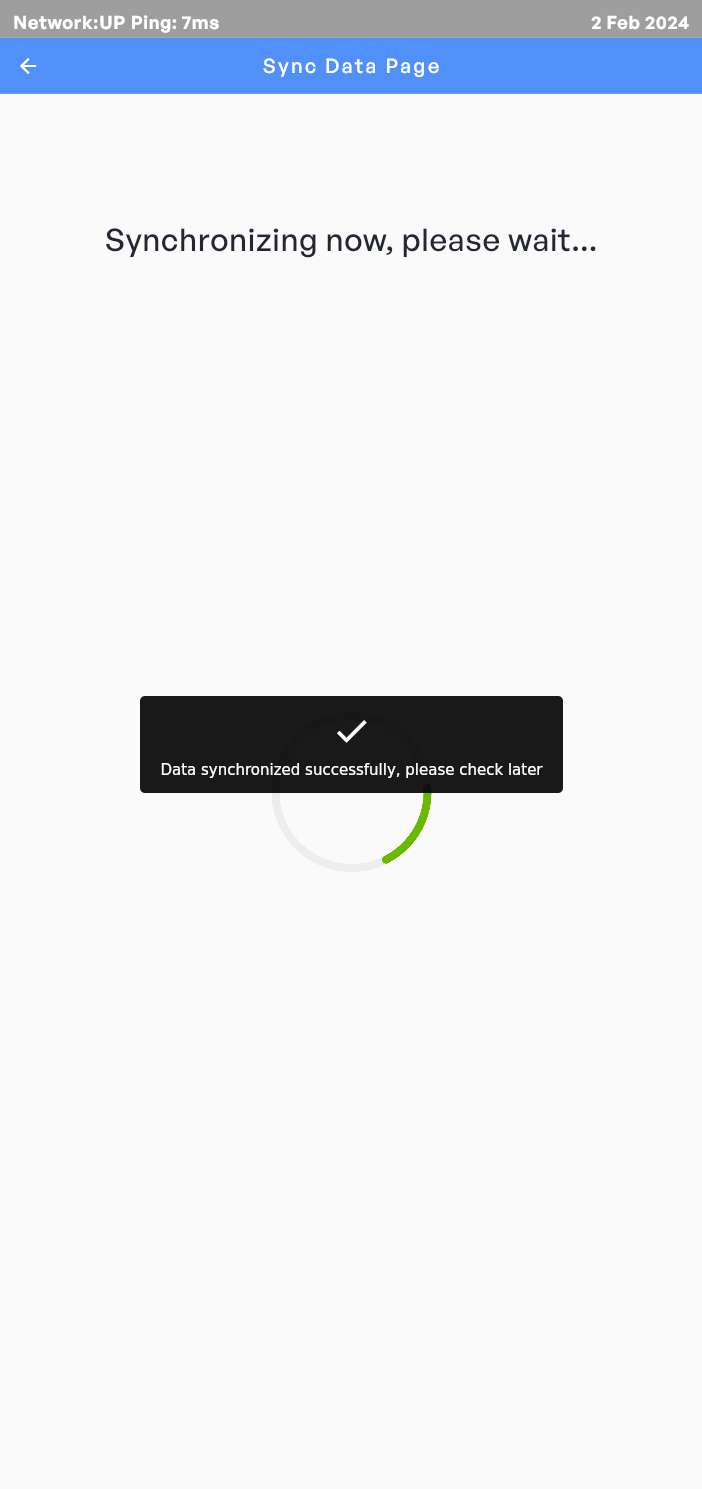
Sync Data
When the Automatic Server Sync feature is disabled, the admin can manually initiate an immediate synchronization of all updated data from the machine to the server.
Restart Vending Machine
Click the Restart button will restart the vending machine. This enables operators to directly restart the machine without having to contact a technician to remotely operate.
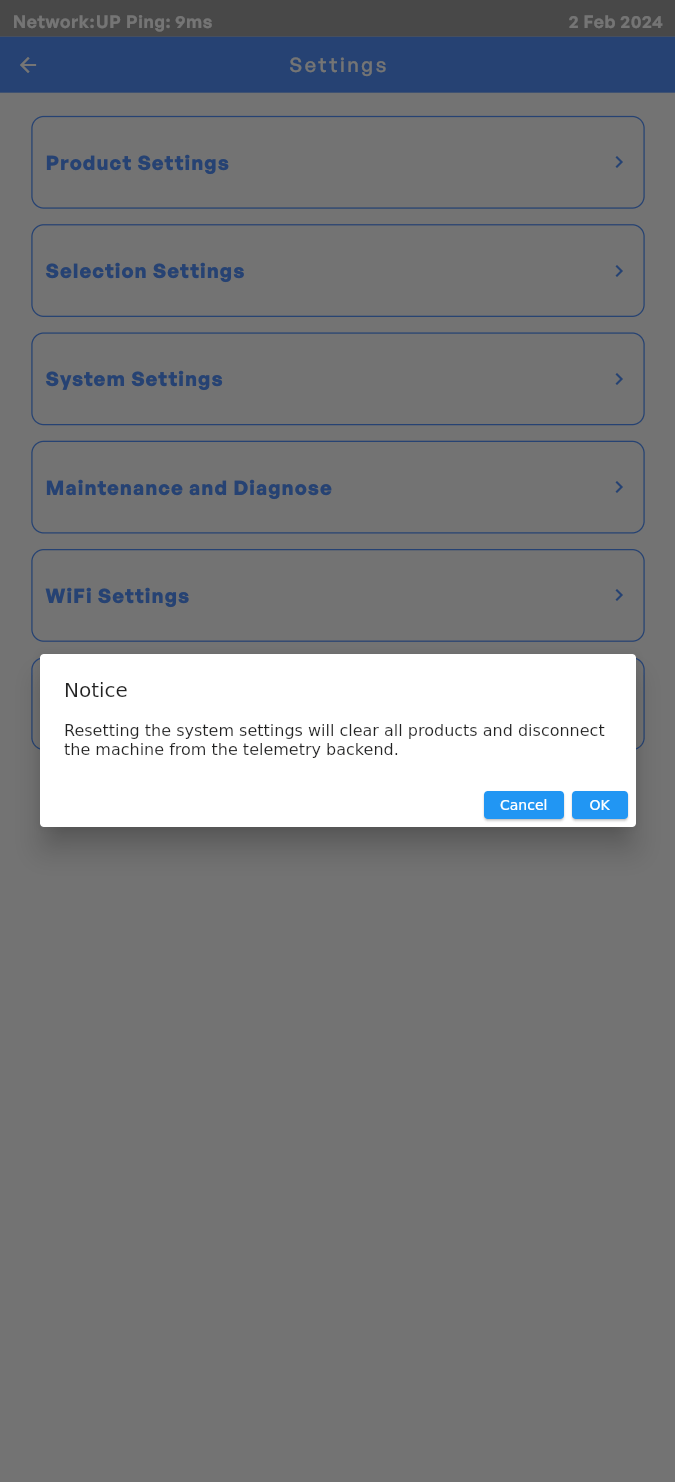
Reset Vending Machine Settings
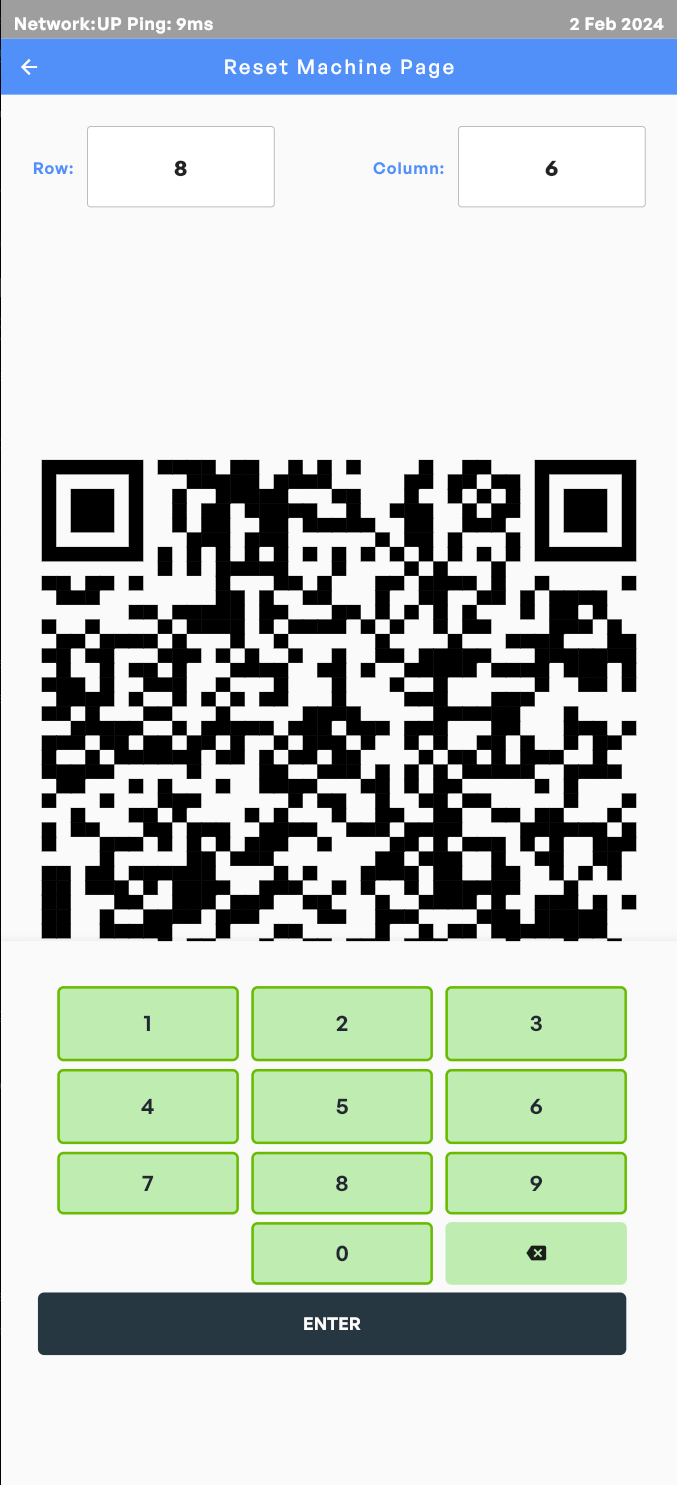
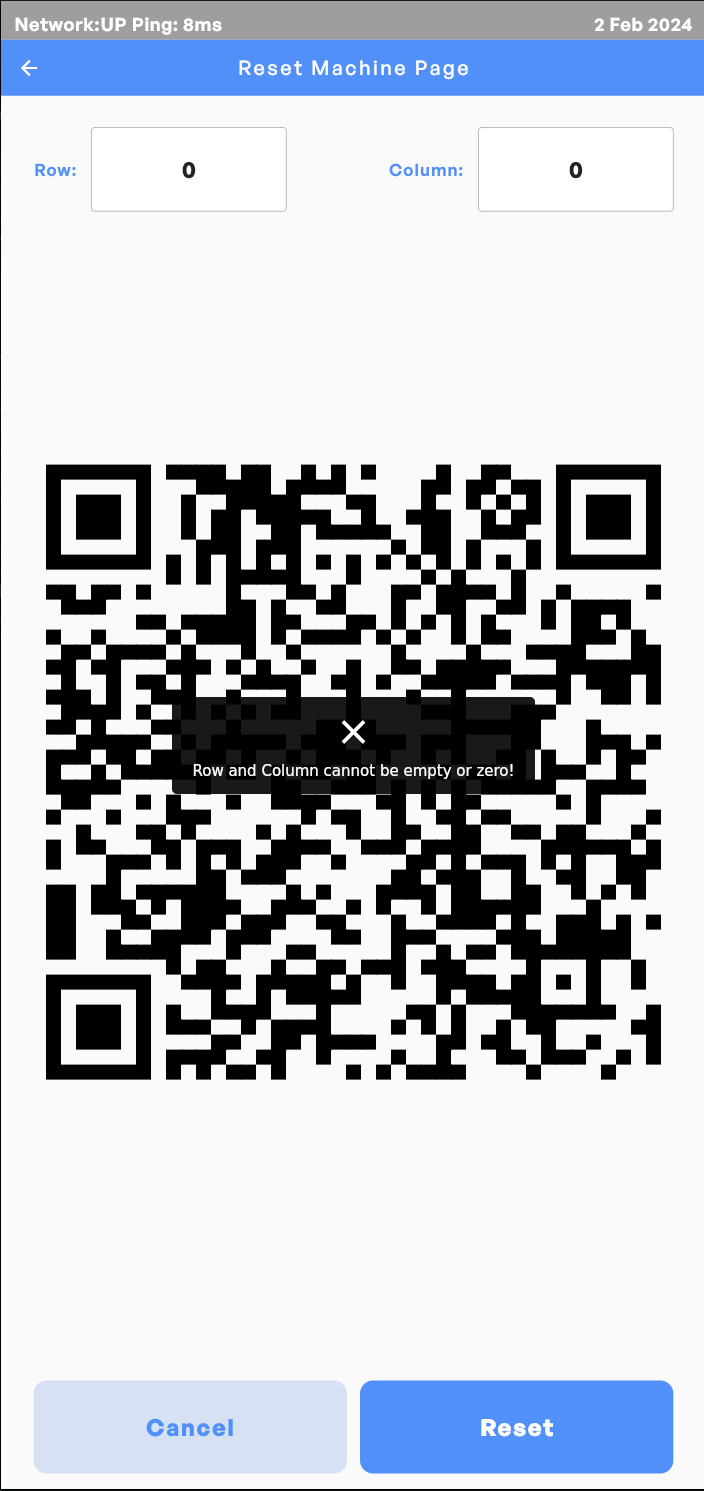
This feature serves the primary purpose of connecting the vending machine to the telemetry backend system. After clicking the Reset Machine Settings button, proceed to input the number of rows and columns of the vending machine. This information enables the system to configure the corresponding selections within the machine. It should be noticed that both the Row and Column fields cannot be left empty or set to 0.
After completing this configuration, please provide the QR code generated to the Vending on Track support team. This will enable us to configure the UUID and API Key in the telemetry backend system on your behalf, ensuring seamless communication between the vending machine and the system.
In the event of a reset, please be aware that the following changes will occur:
- All existing products will be cleared.
- The default homepage will be set to the code input page as there is no product to display.
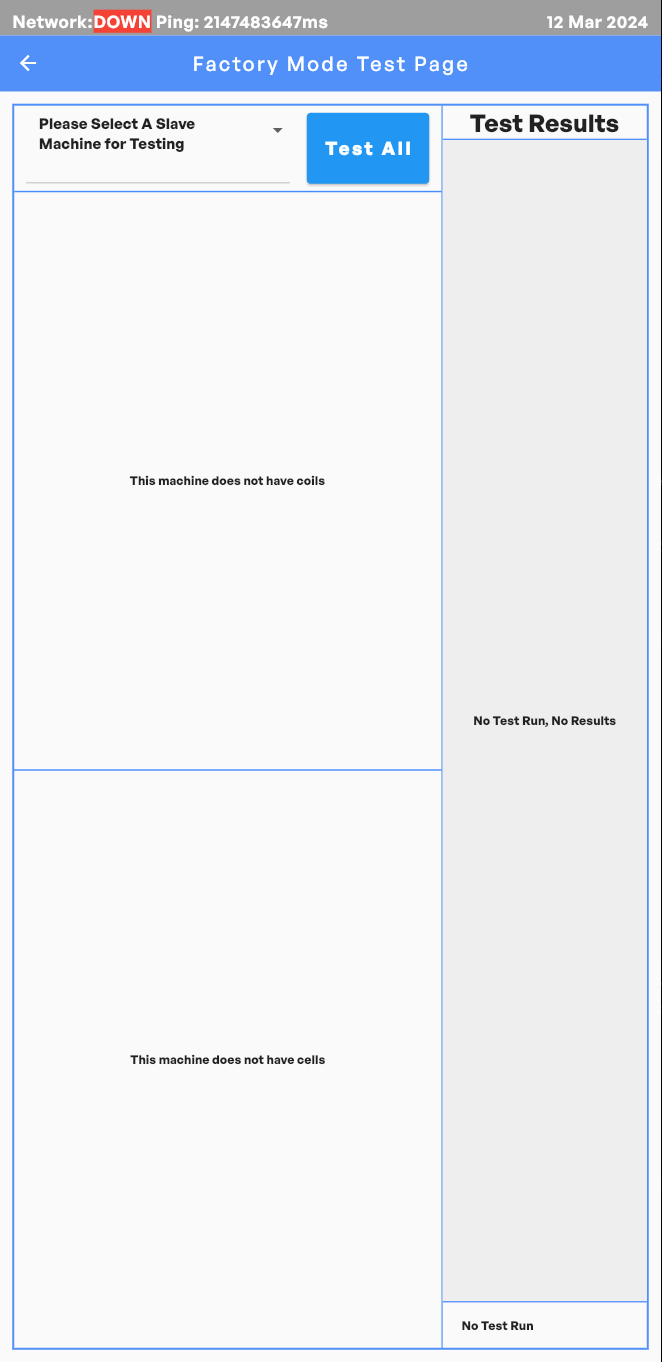
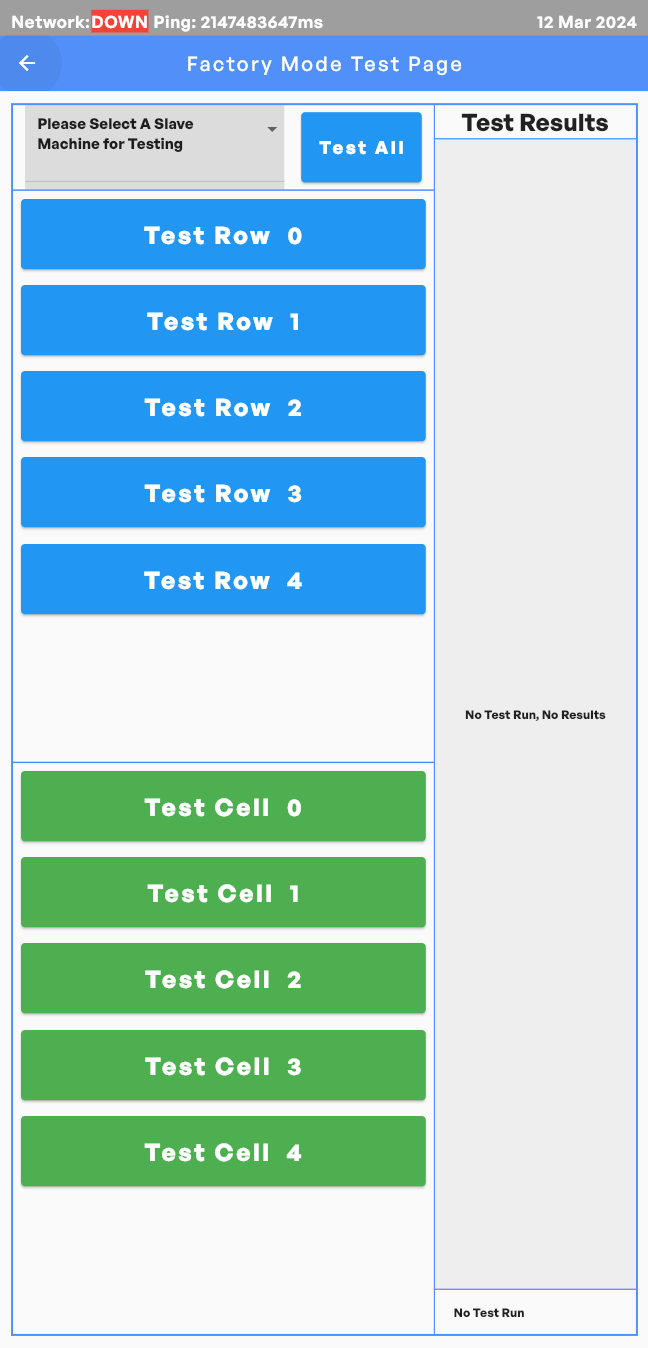
Factory Mode Test
This section is exclusively designed for distributors or workshops, in which the rotation of all the coils and the opening of all the locker cells can be tested.
Contact us if you require detailed instructions.