PPE User Manuals
Background
PPE Vending - an innovative solution that combines traditional vending machines with smart locker systems to provide and manage Personal Protective Equipment (PPE) efficiently.
The vending machines hold disposable items like masks, while returnable items such as helmets are housed and tracked in individually assigned smart locker cells.
To access the equipment, employees can enter an access code or tap their employee card. The access code and pickup method can be set up through the PPE management backend system.
Employee Flow
The step-by-step guidance of Access Code Login is available in the user manual below.
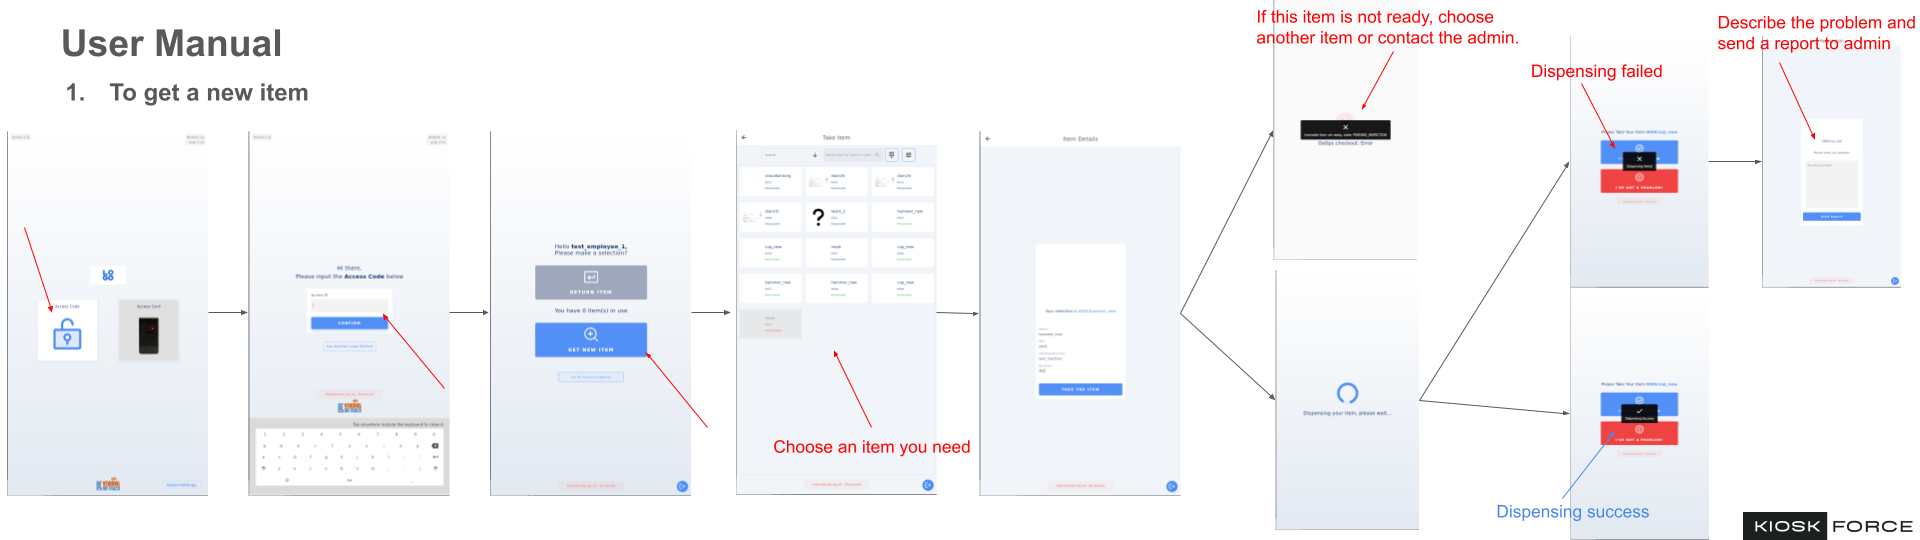
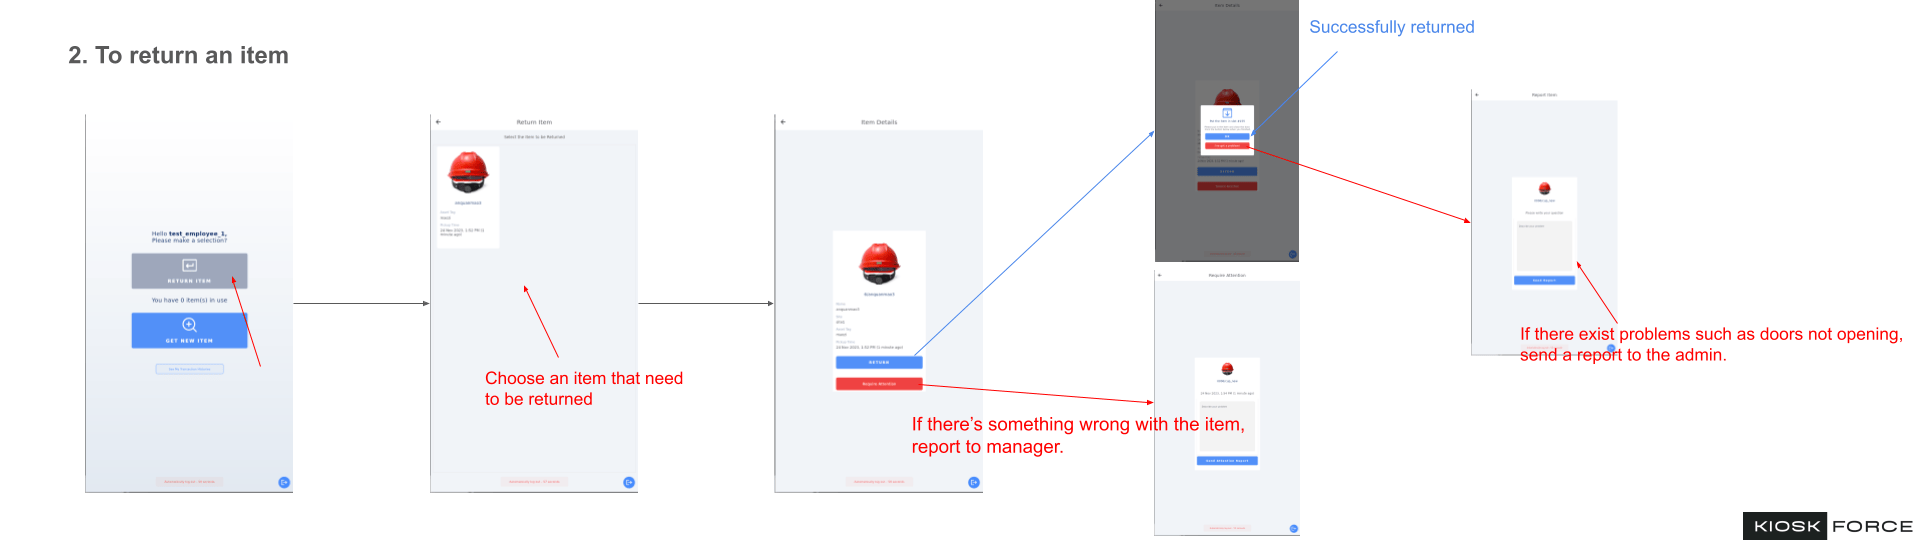
High resolution PDF available upon request
System Settings in Portal
Employee Login Settings
This part can be found at https://ppe.vendingontrack.com
Within the Organization Settings section, administrators can navigate to the Access Code Configuration and PPE Pickup Methods modules.
The Access Code Configuration module is where the admin can set whether to allow employees to log in using the access code. Upon enabled, specific code formats, including numeric and alphanumeric, can be specified.
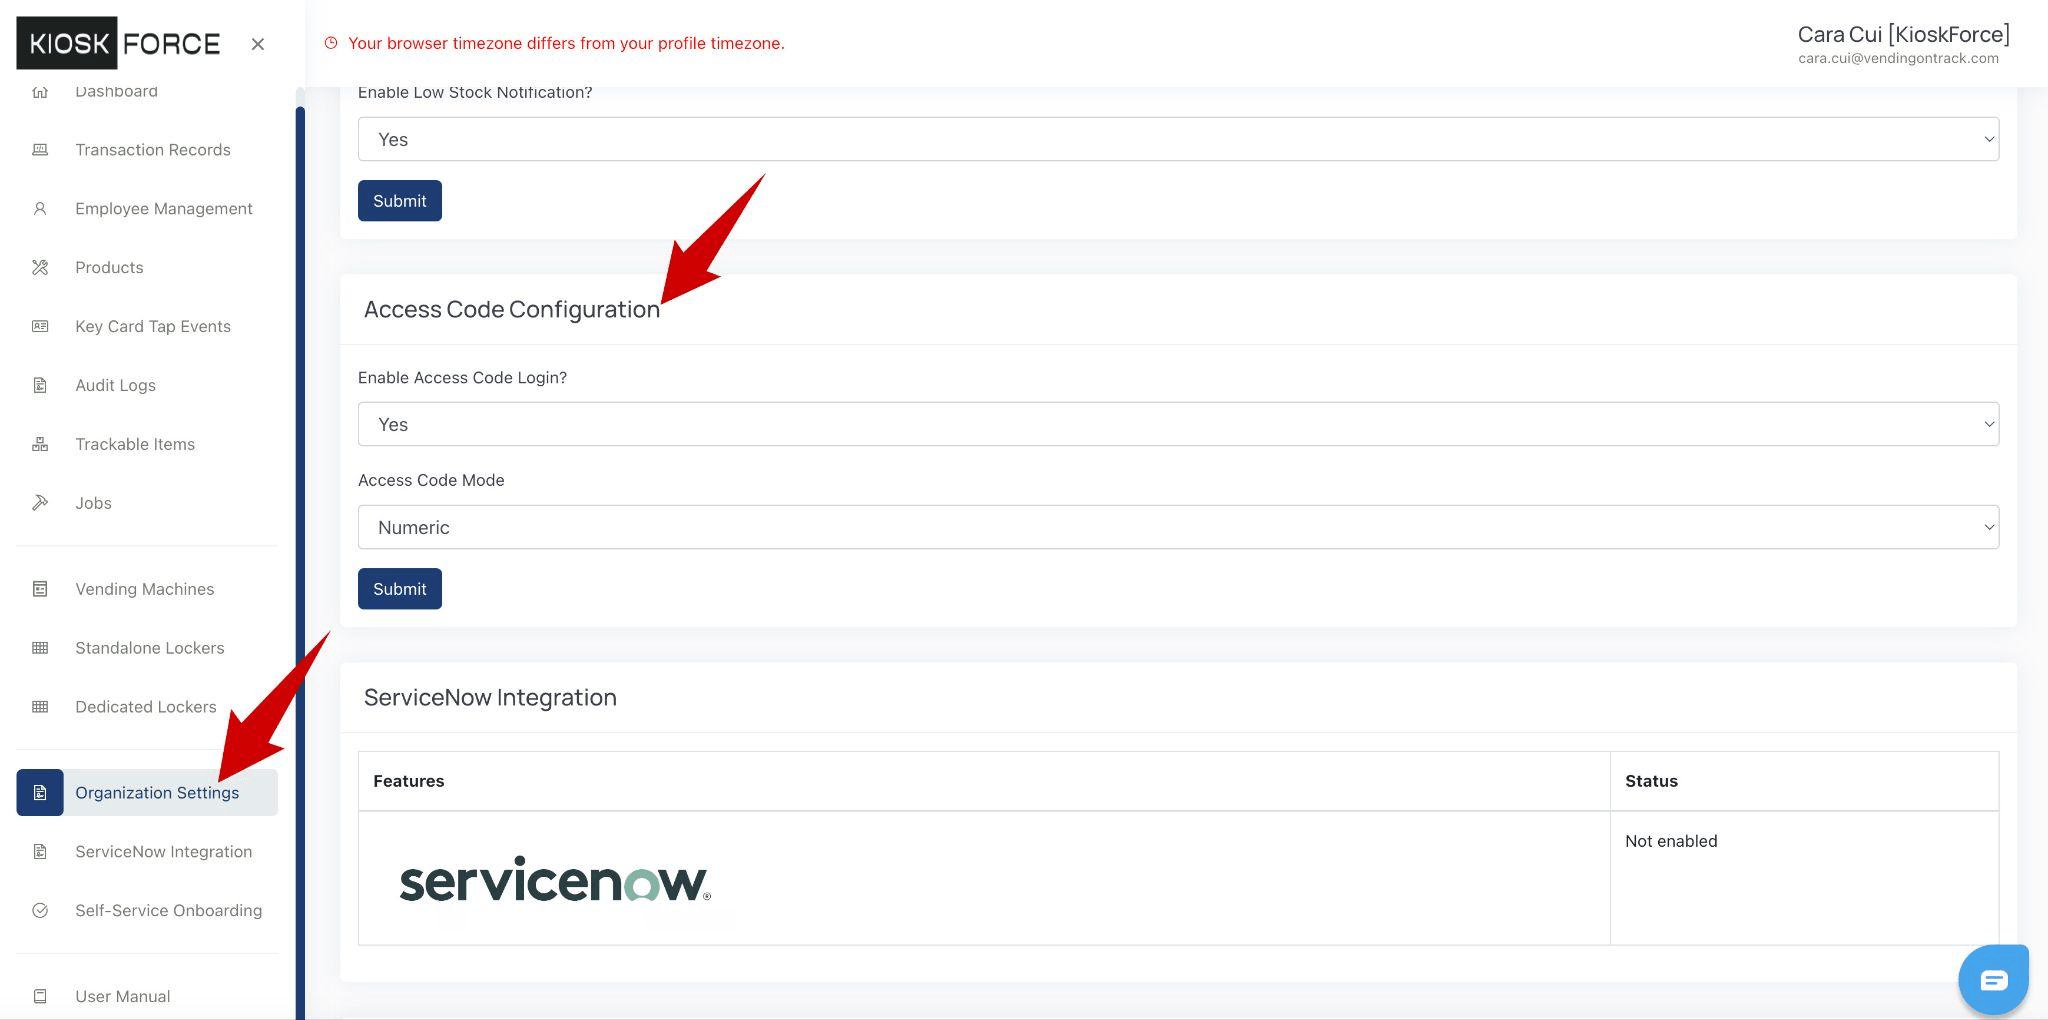

In the PPE Pickup Methods module, the admin can set whether to enable the mobile app login and swipe card login. This allows a selection of the preferred employee authentication approach.

Other Settings
Please refer to https://ppe.vendingontrack.com/manual/ for full detailed user manual for PPE Vending.
Settings on Vending Machines/Kiosks
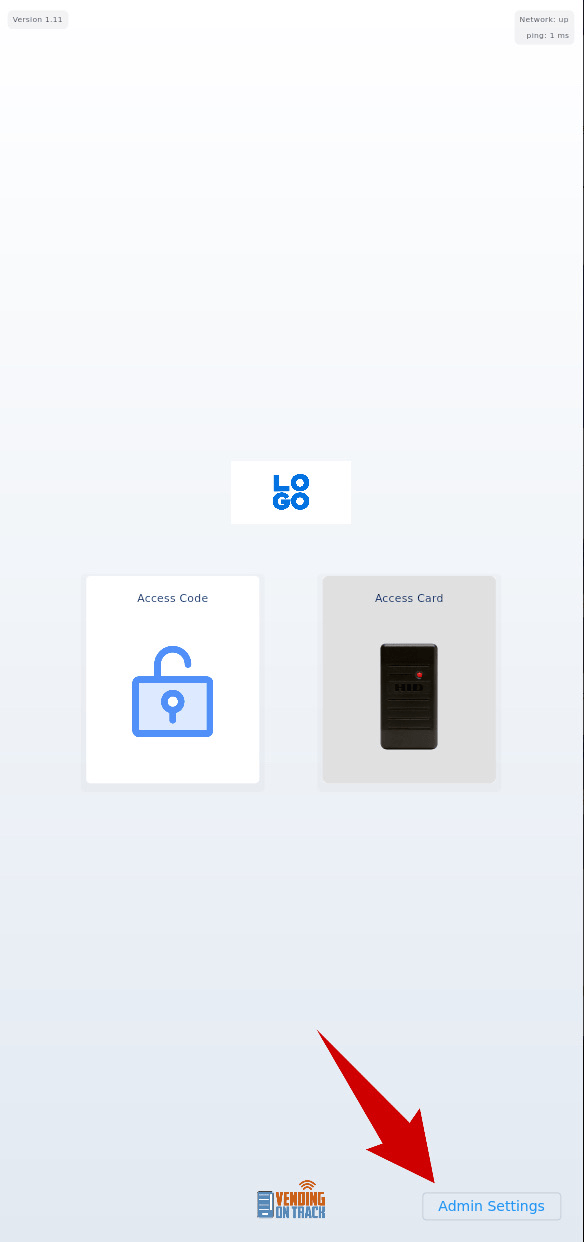
Enter the Admin Interface
Authorized personnel can gain access to the administration console through the vending machine’s primary user interface by tapping the Admin Settings button at the right bottom. After approaching the Pin Verification interface, input the assigned pin code for identity verification.
Upon authenticated entry into the administrative interface, multiple settings can be completed, such as selection settings, system settings, maintenance and diagnose and WiFi settings.

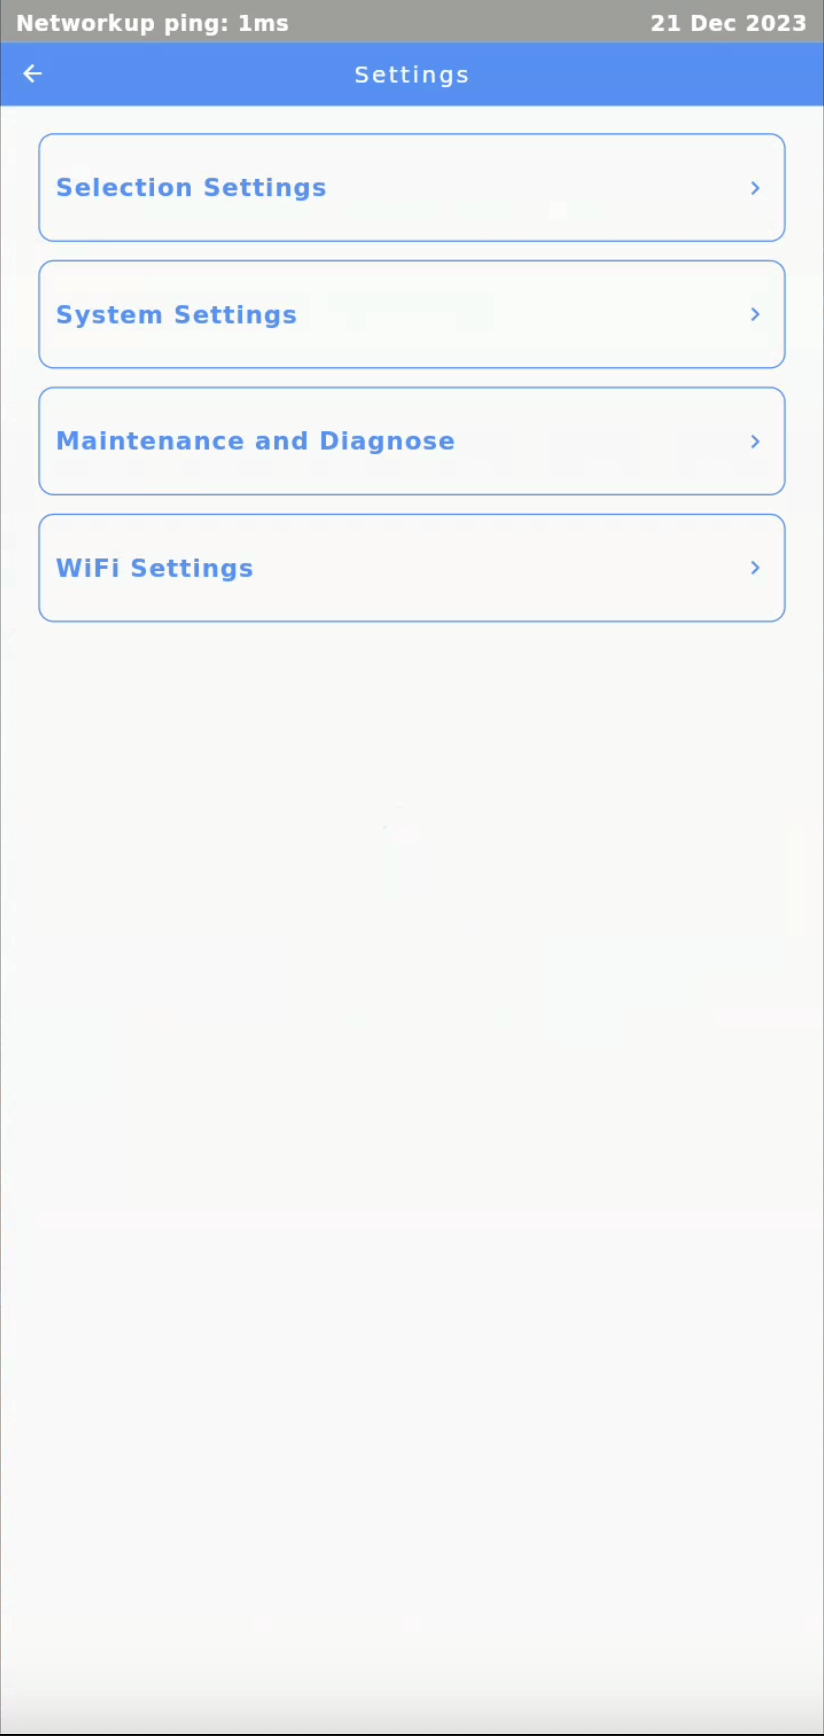
System Settings
Selection Settings
The Selection Settings module enables the admin to test dispensing and manage product mappings.
Each Test has controls to simulate the dispensing process for validation or troubleshooting.
Items can be reallocated to a specific selection code.
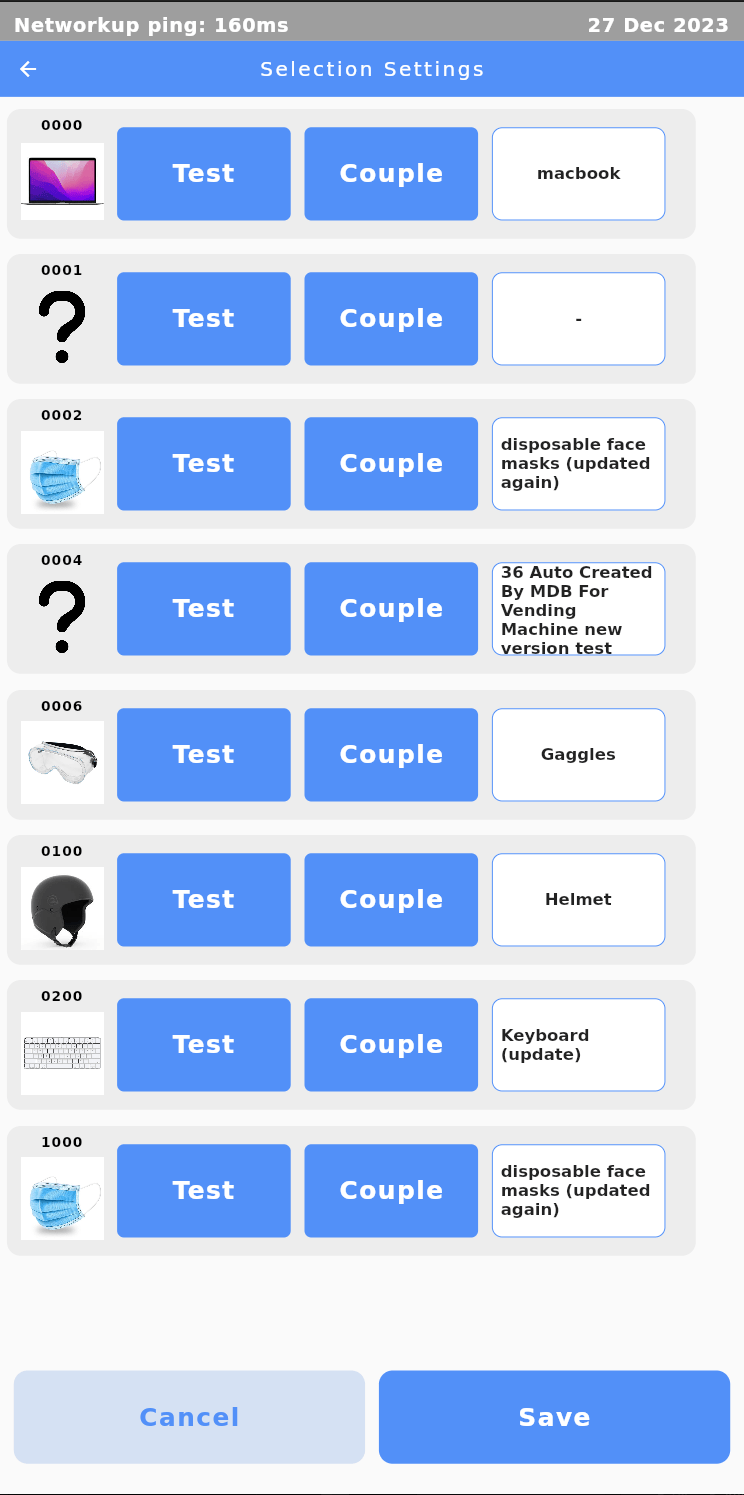
Motor Coupling
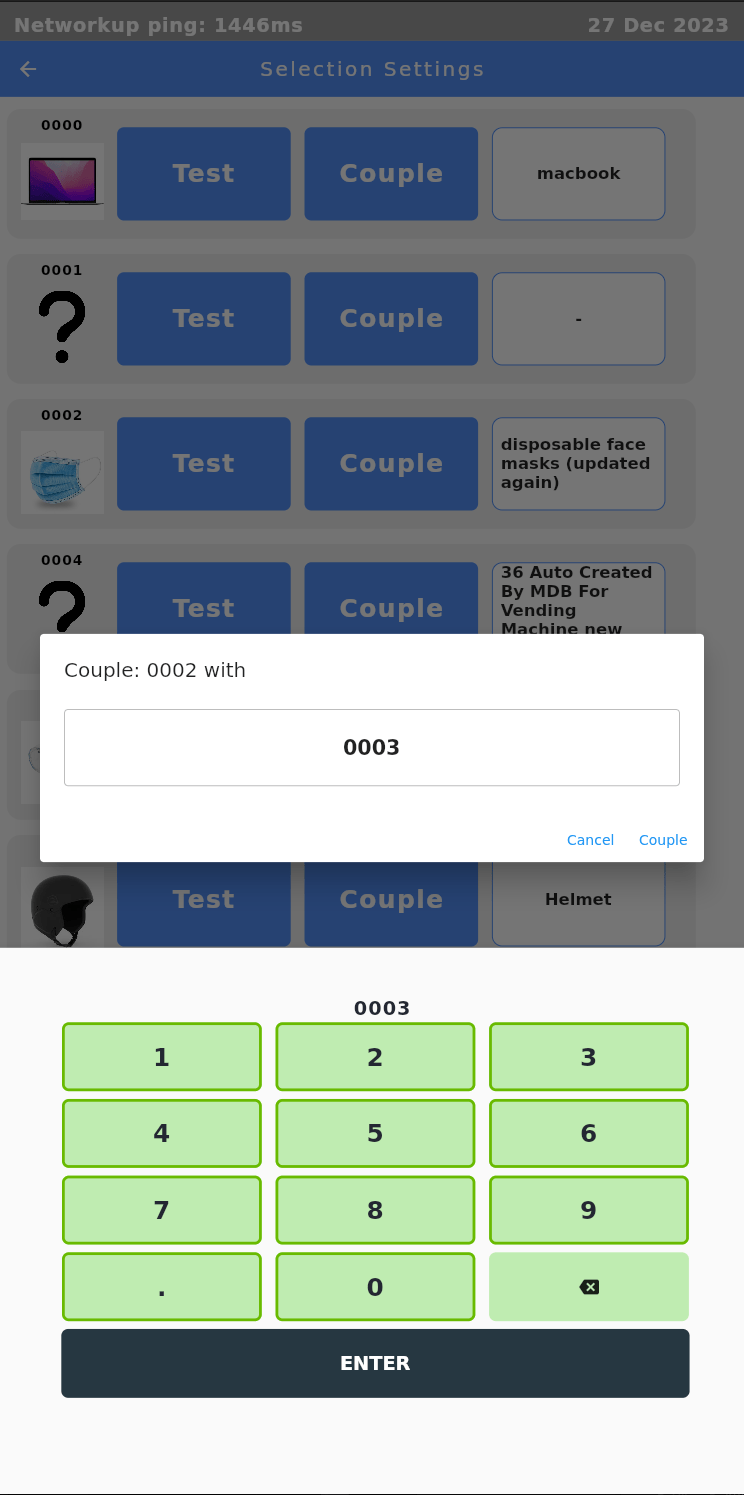
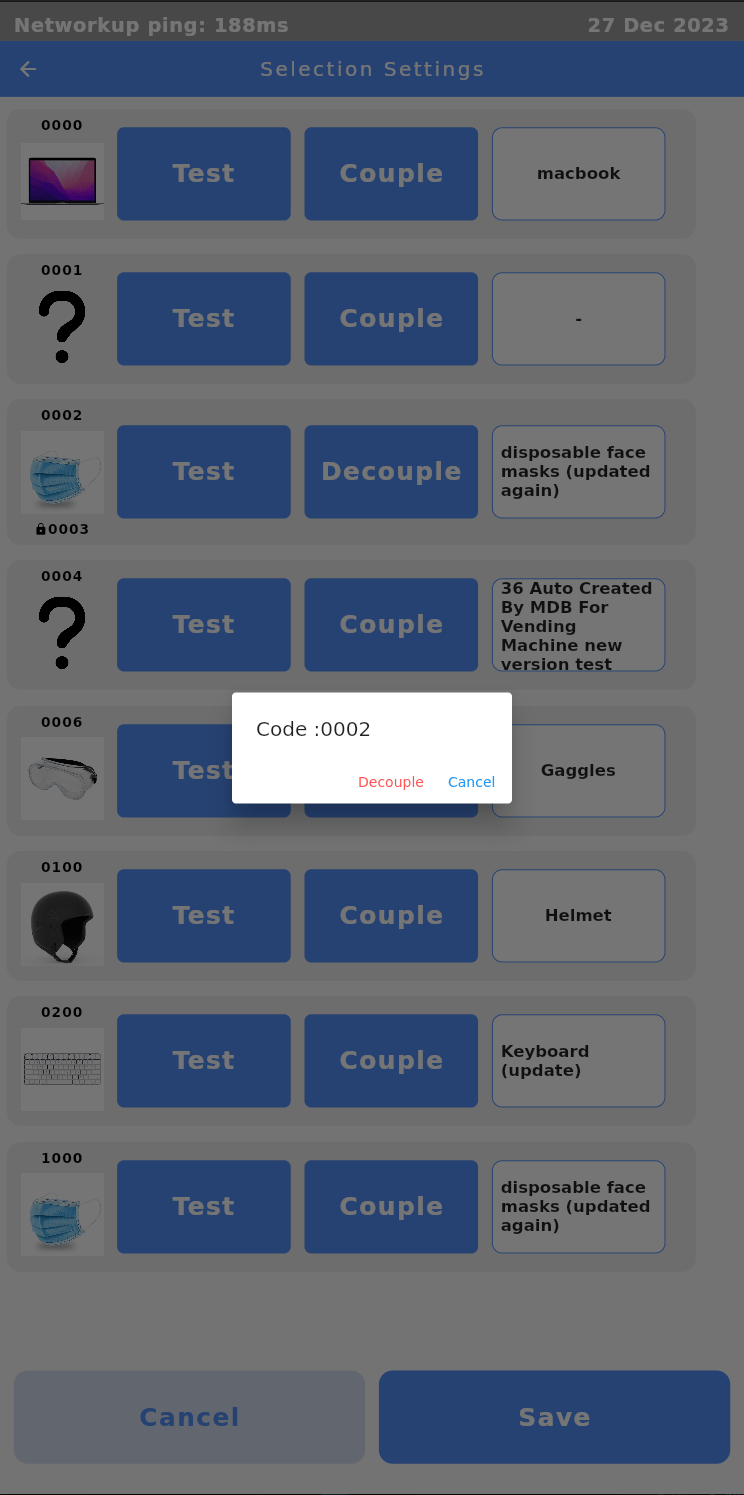
KioskForce vending machines have innovatively introduced a new feature - motor coupling, which allows operators to manually couple two separated motors to make them operate in sync.
To couple motors, click on the Couple button and enter the motor number you want to link. To cancel the coupling, click on the Decouple button.
However, pay attention that there are several configuration rules to follow when coupling the motors:
- The couple code entered must be in the correct format. Normally, the motor code should consist of four digits, where the first three digits represent the machine, the x and y positions respectively.
- The couple code should not be the same as the pin code for entering the admin interface like 9999.
- Only adjacent motors can be coupled. The motors must be physically next to each other on the same tray.
- Cross-tray coupling is not allowed. Motors on separate shelves or levels cannot be coupled. In other words, the first three digits of the motor code should be the same.
- Avoid coupling motors that have already been assigned to an item selection. Any motor that has been assigned to an item selection cannot be coupled.
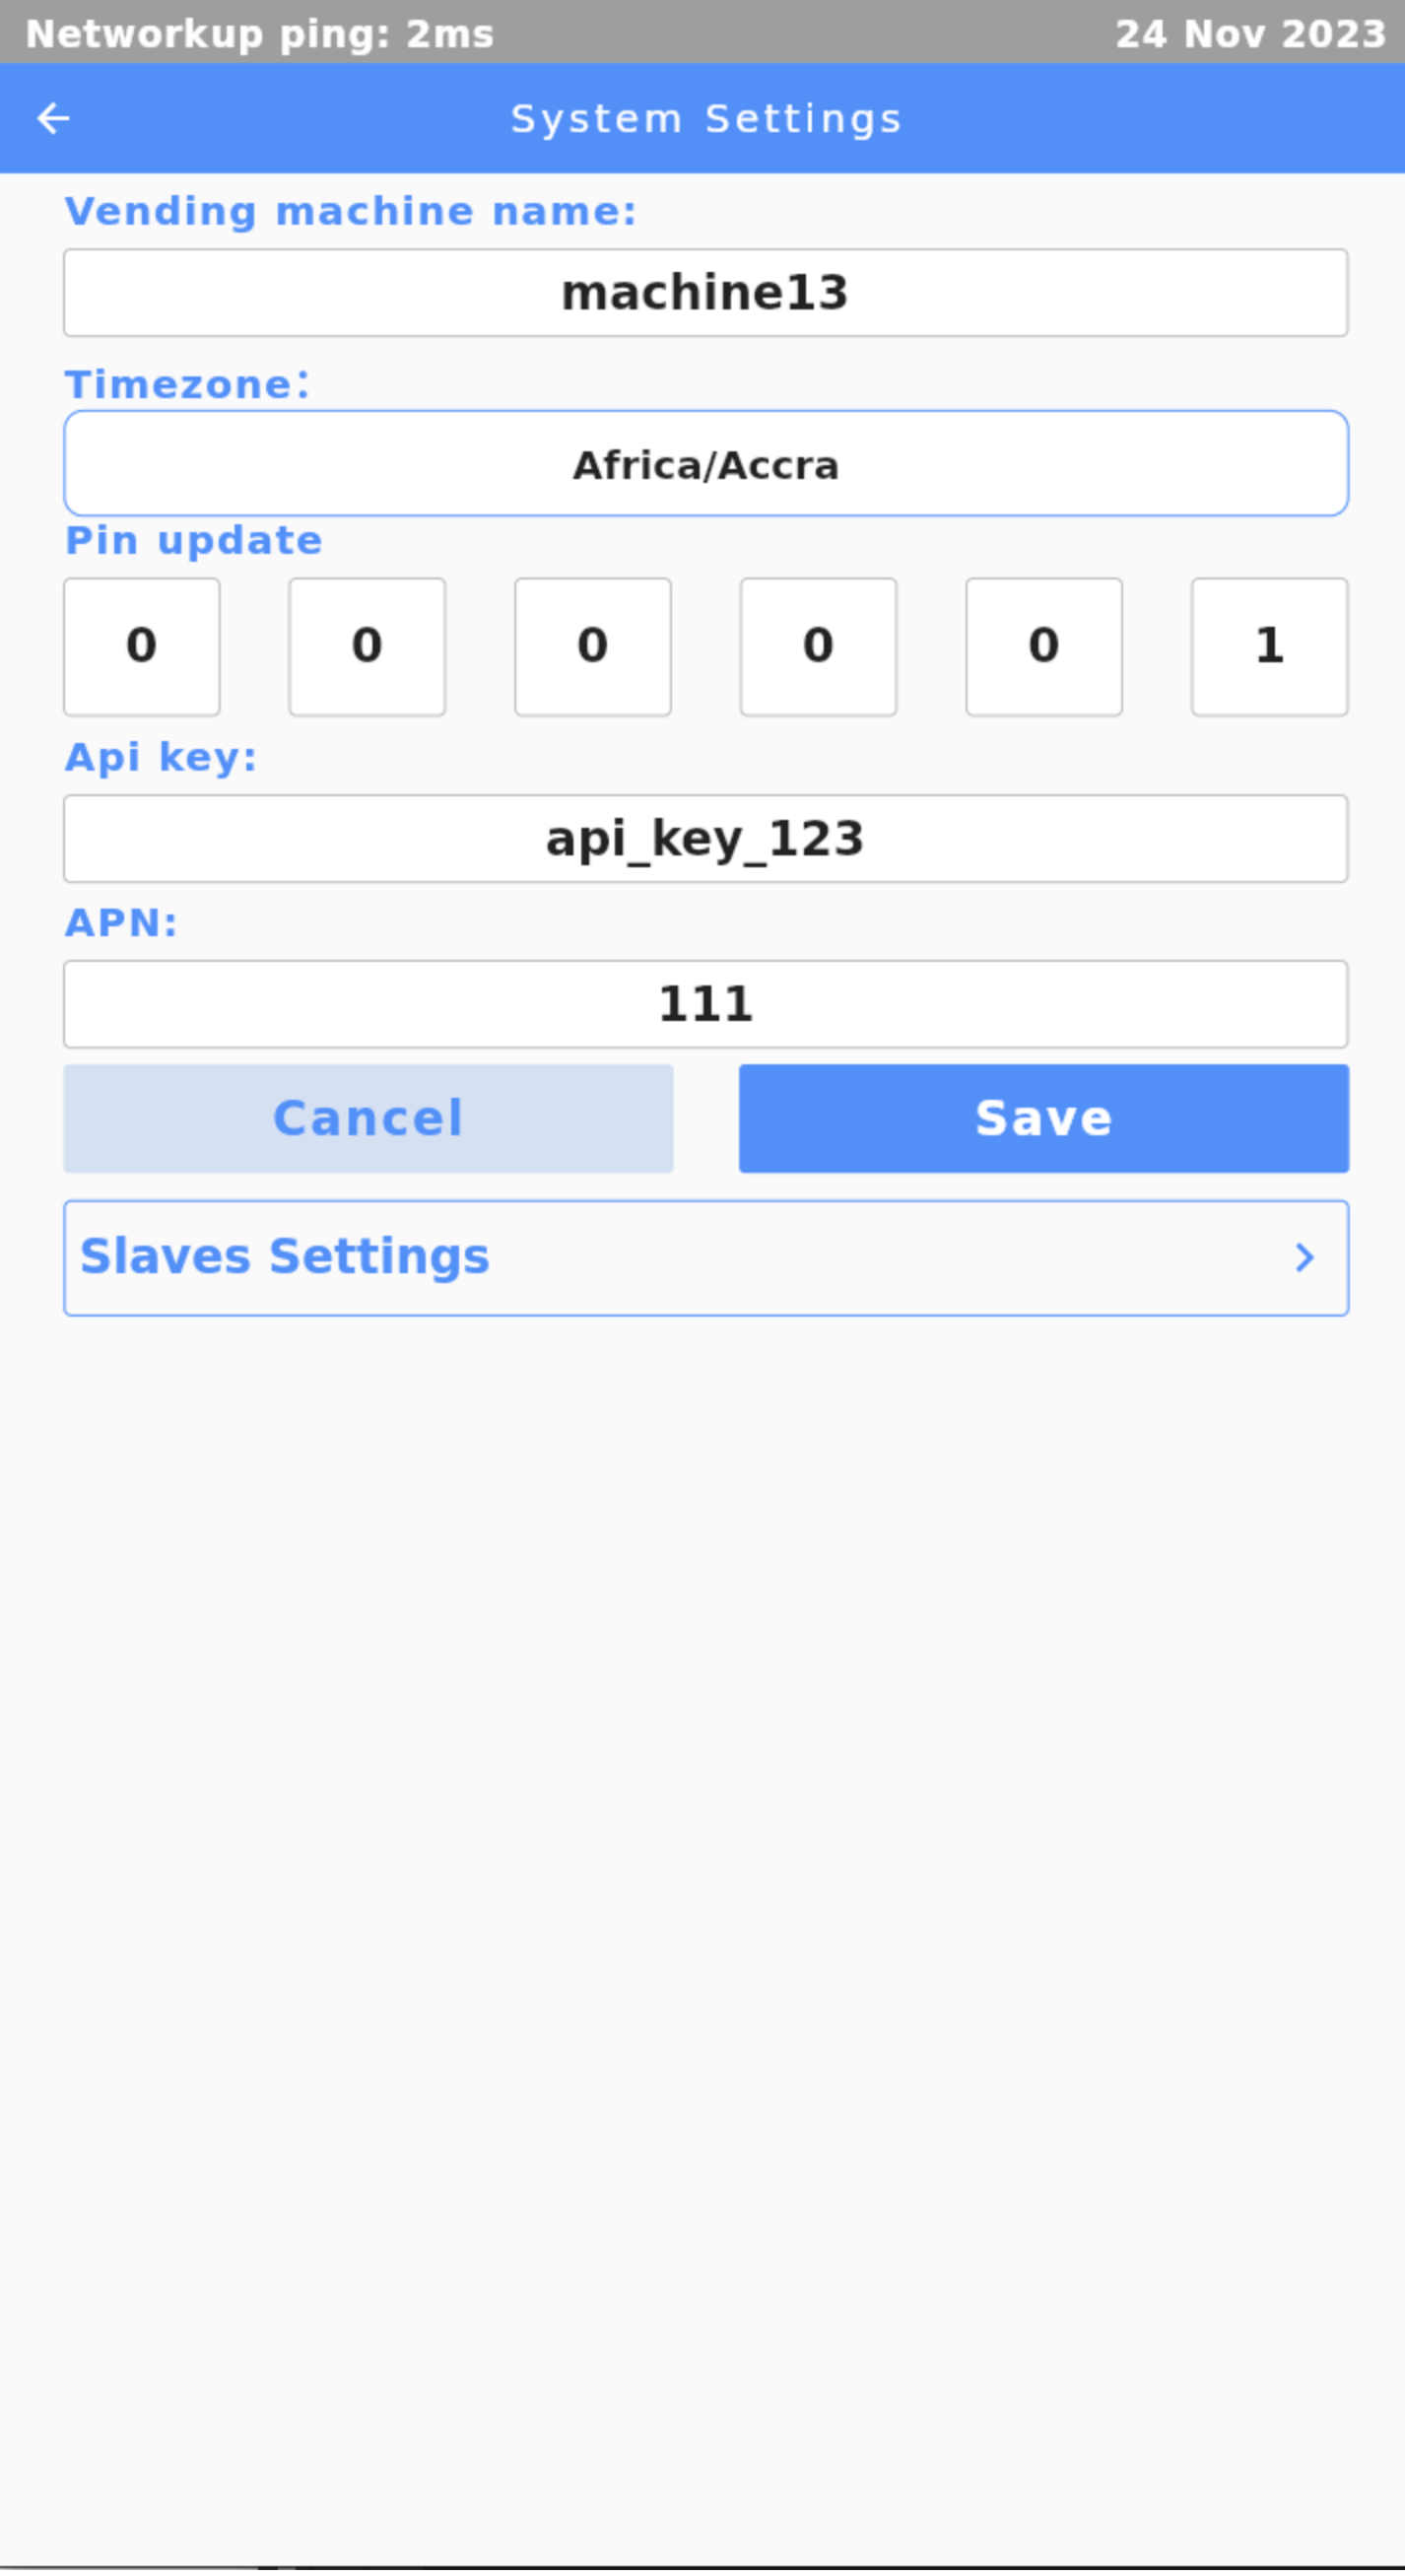
Vending Machine System Settings
Vending Machine Name
A unique machine name should be manually entered for clear tracking, monitoring and maintenance of each vending machine.
Timezone
Multiple time zones are provided to select according to the geographic location where the machine is located.
Pin update
Administrative pin code can be modified here securely for access to the admin settings system.
API key
Enter the valid API key to connect the machine to the backend PPE management system.
APN
APN is used by the 4G/LTE communication modules.
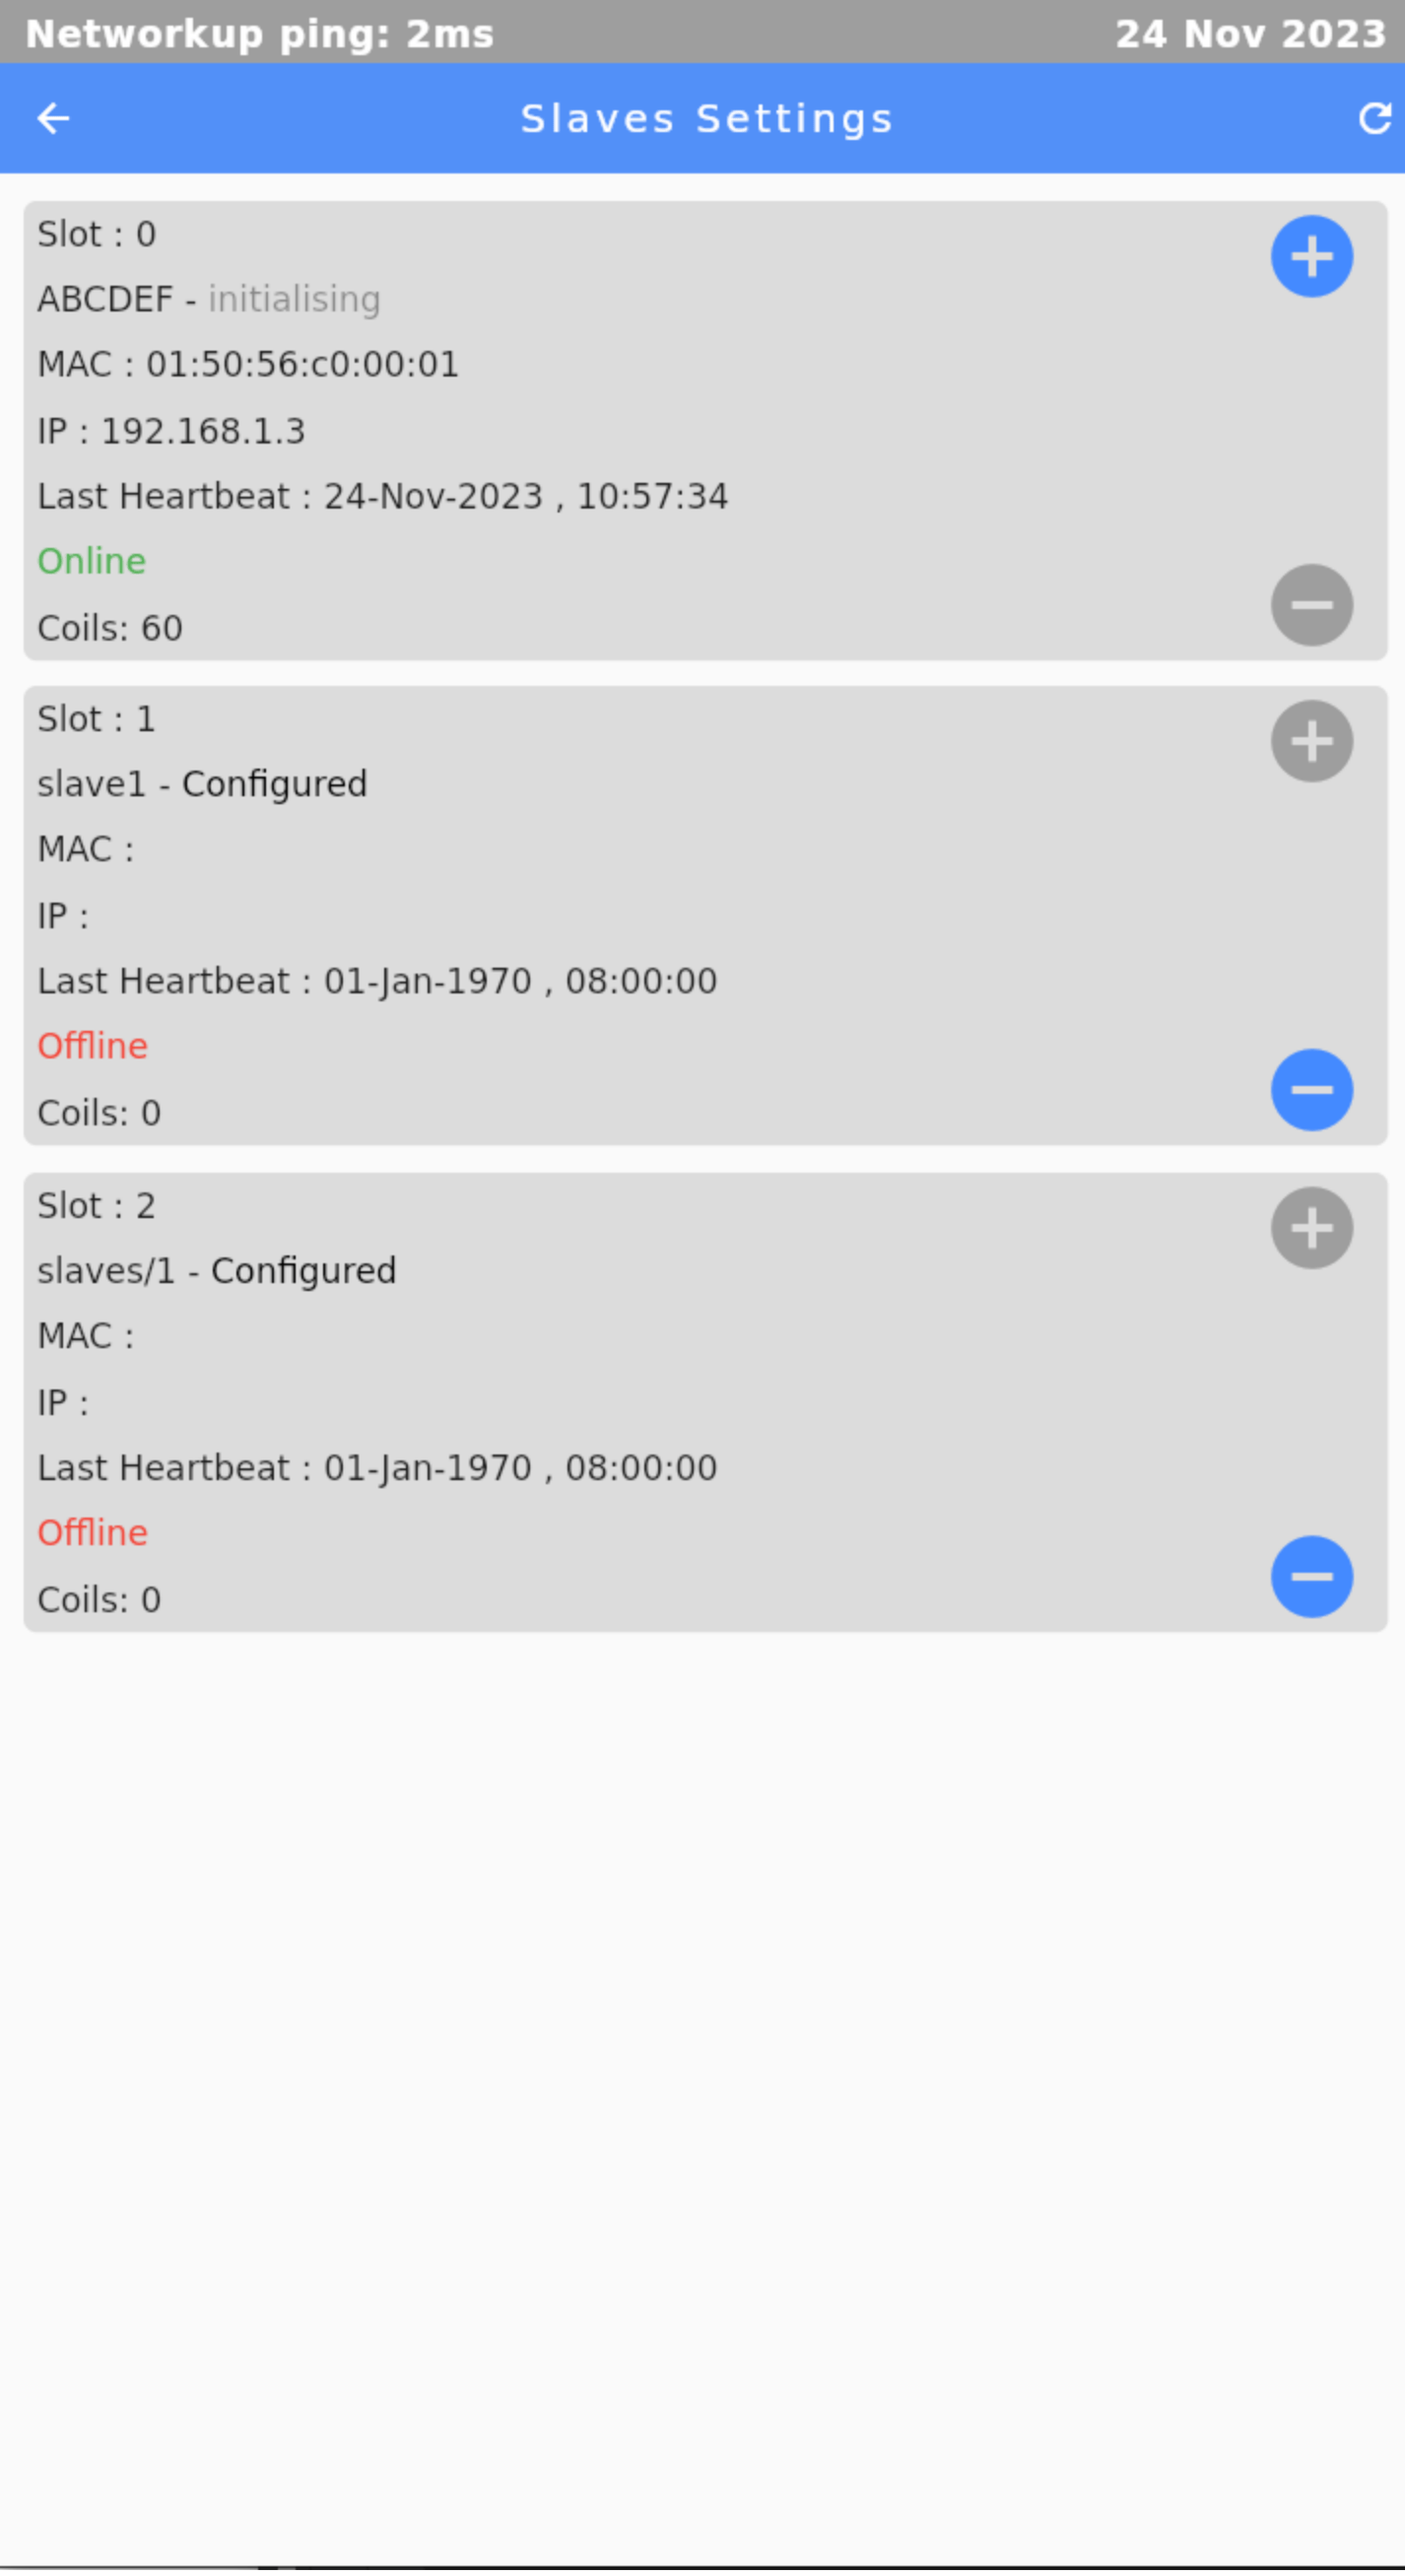
Slave Settings
Information of peripheral devices / slaves is shown here, such as slot number, IP address, online status, and the last time the slave communicated to the host.
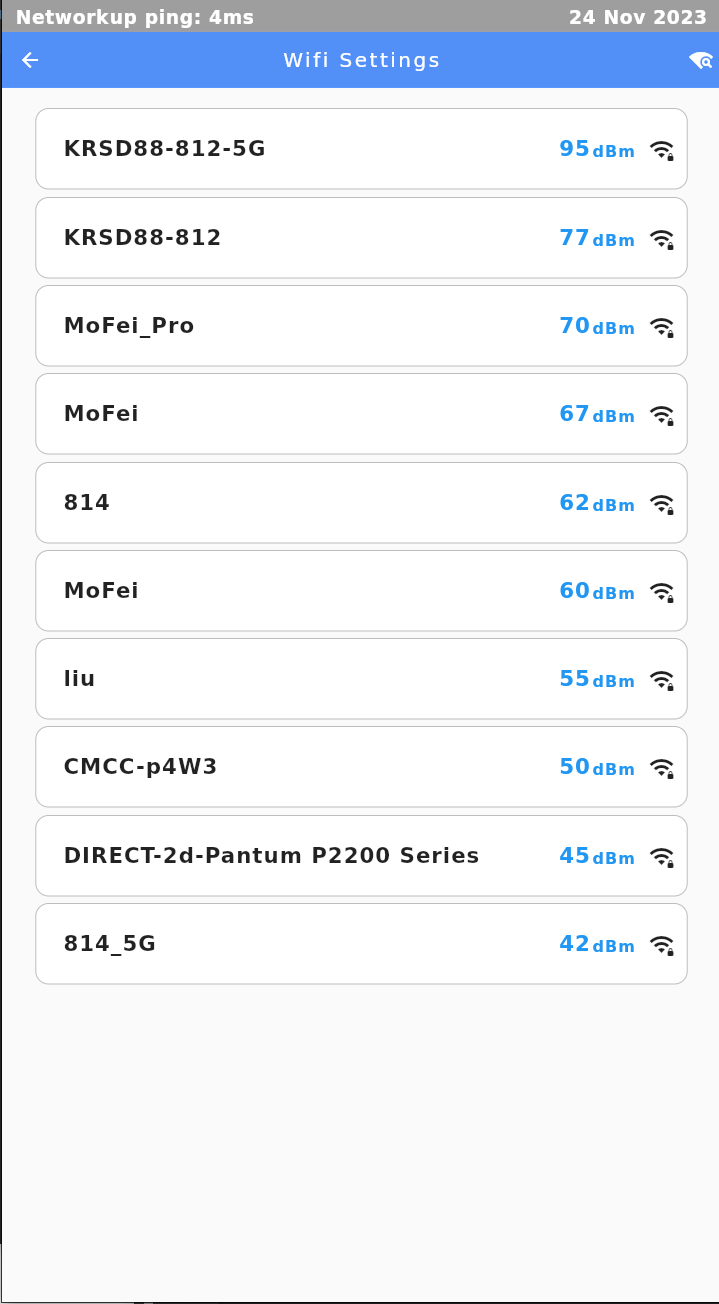
WiFi Settings
In the WiFi settings page, the system lists all the available WiFi networks. Operators can click the WiFi network name, and input the password for the Network to finalize the WiFi network settings.
Maintenance and Diagnose
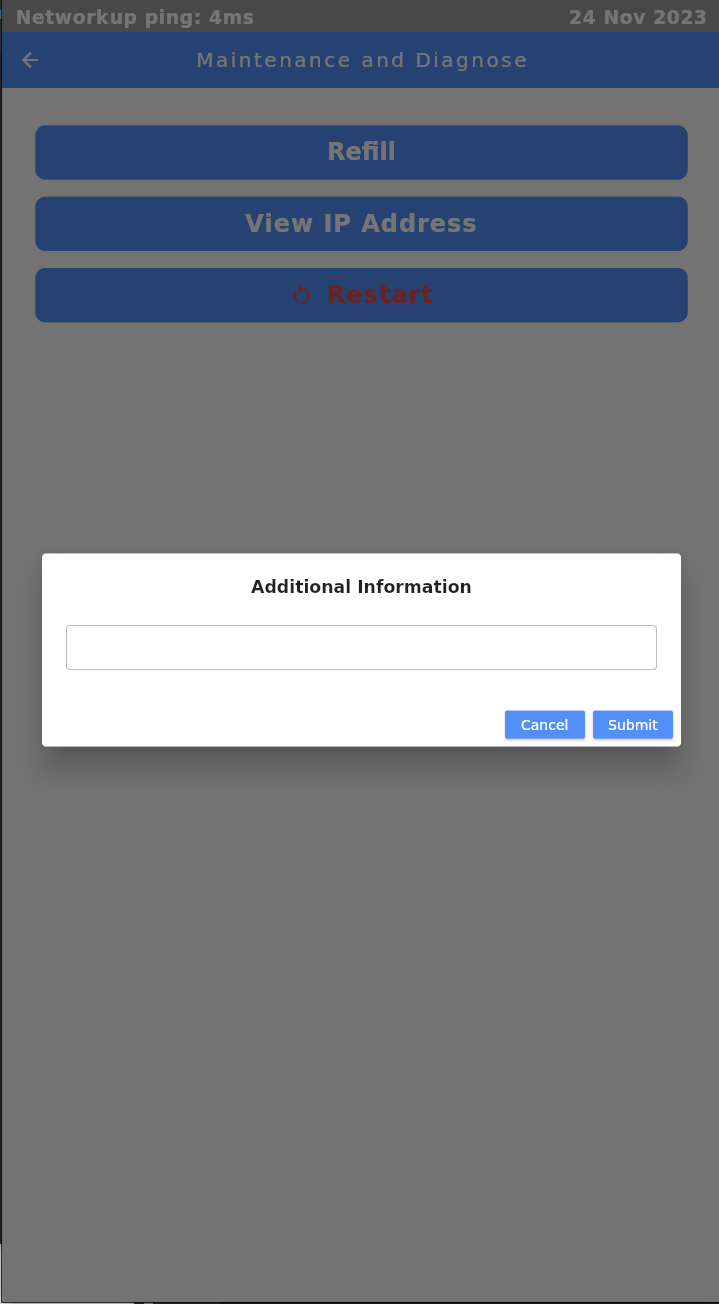
Mark vending machine as refilled
Trays that are out of stock will automatically be disabled to prevent failed vending until inventory is restocked and the Refill key is clicked.
Upon Refill confirmation, optional remarks can be added.
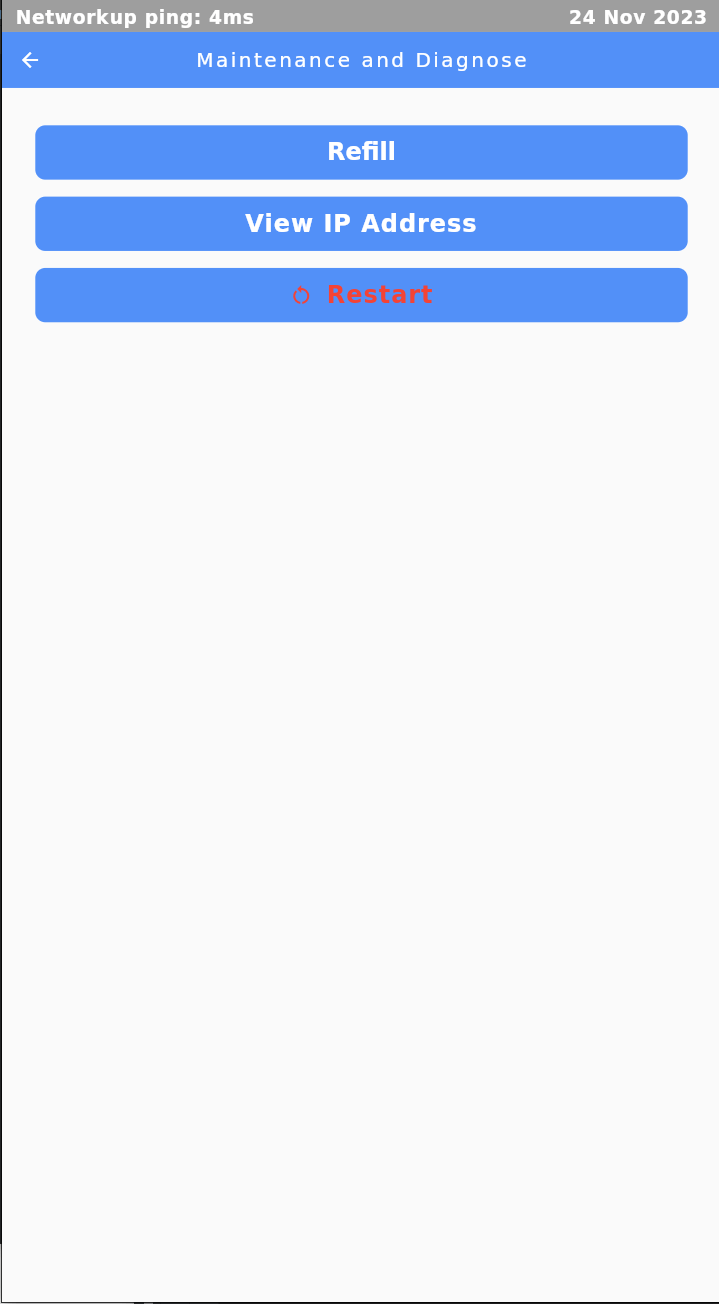
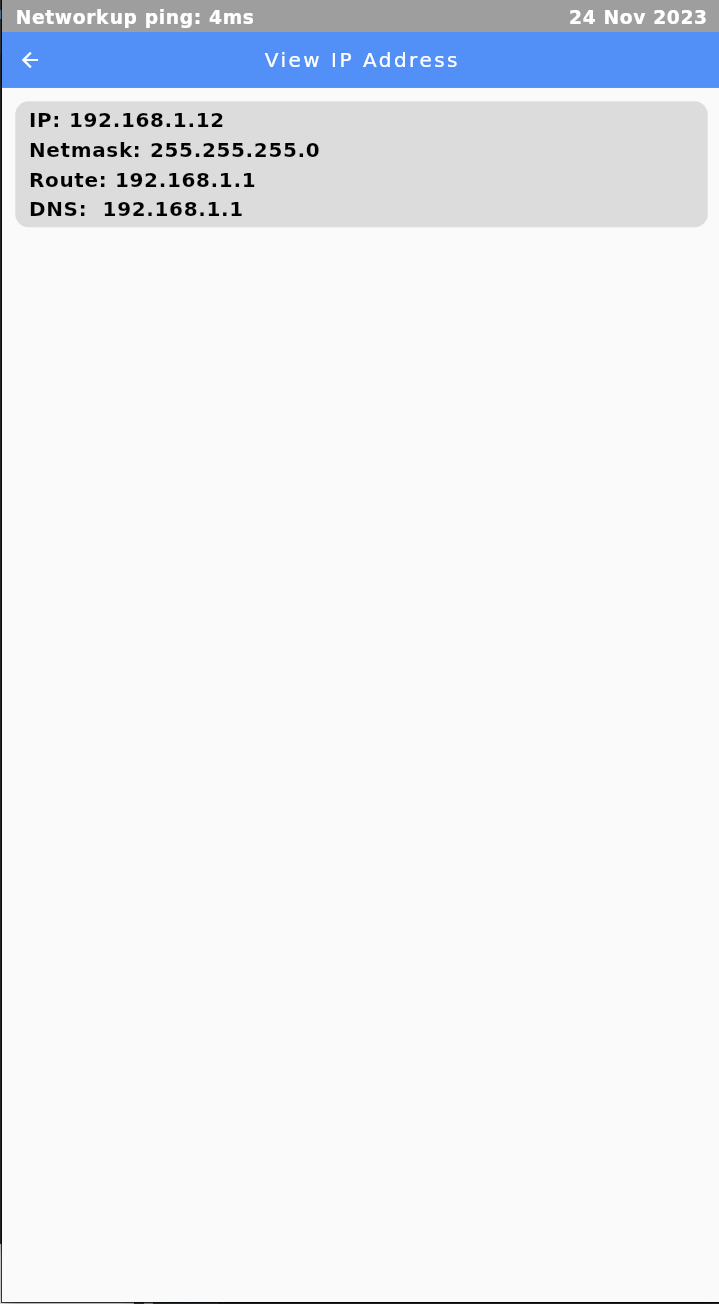
IP Addresses
IP Address of the machine can be checked here.
Restart Vending Machine
Click the Restart button will restart the vending machine. This enables operators to directly restart the machine without having to contact a technician to remotely operate.
